Thick cap brim

Hello everyone.
Im trying to make a cap and got a problem with the brim. The original cap visor is 4mm thick edging. If I add thickness to the pattern piece, the connection of the visor to the cap looks distorted.
Any ideas on how to make it look good?
Thanks.
-
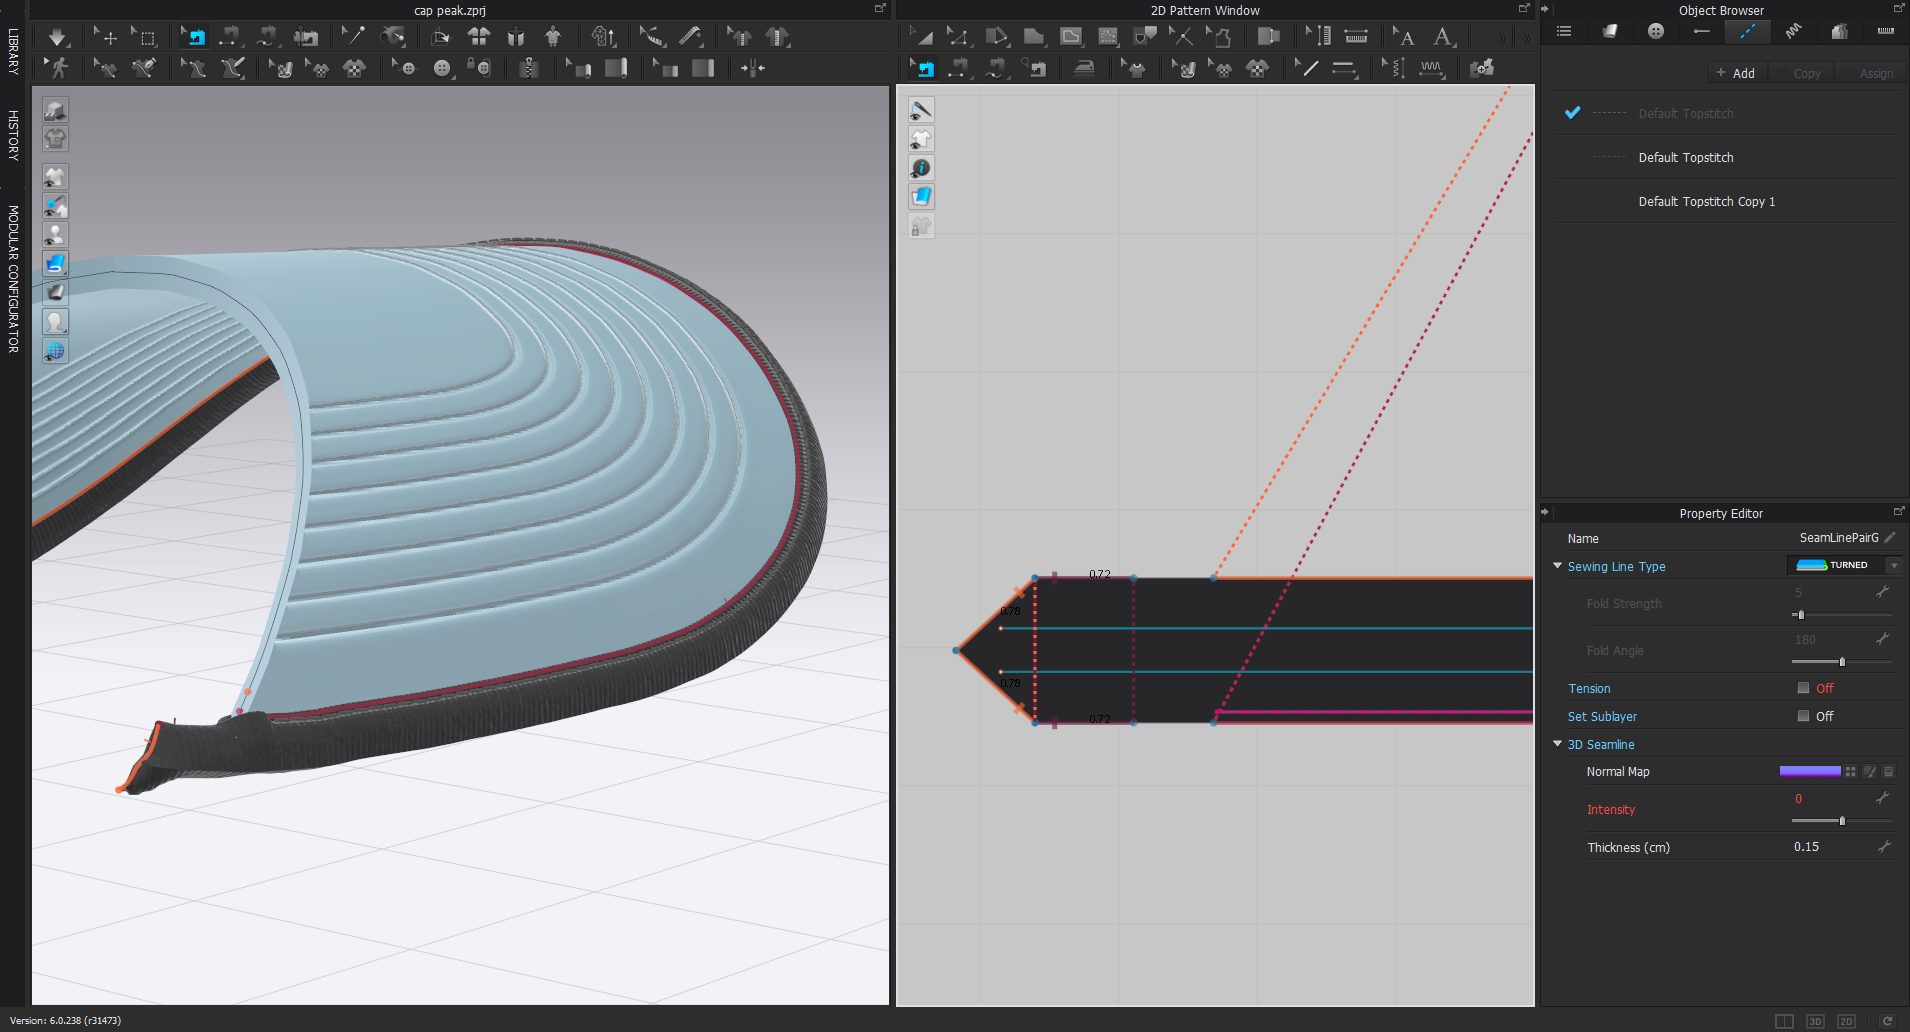
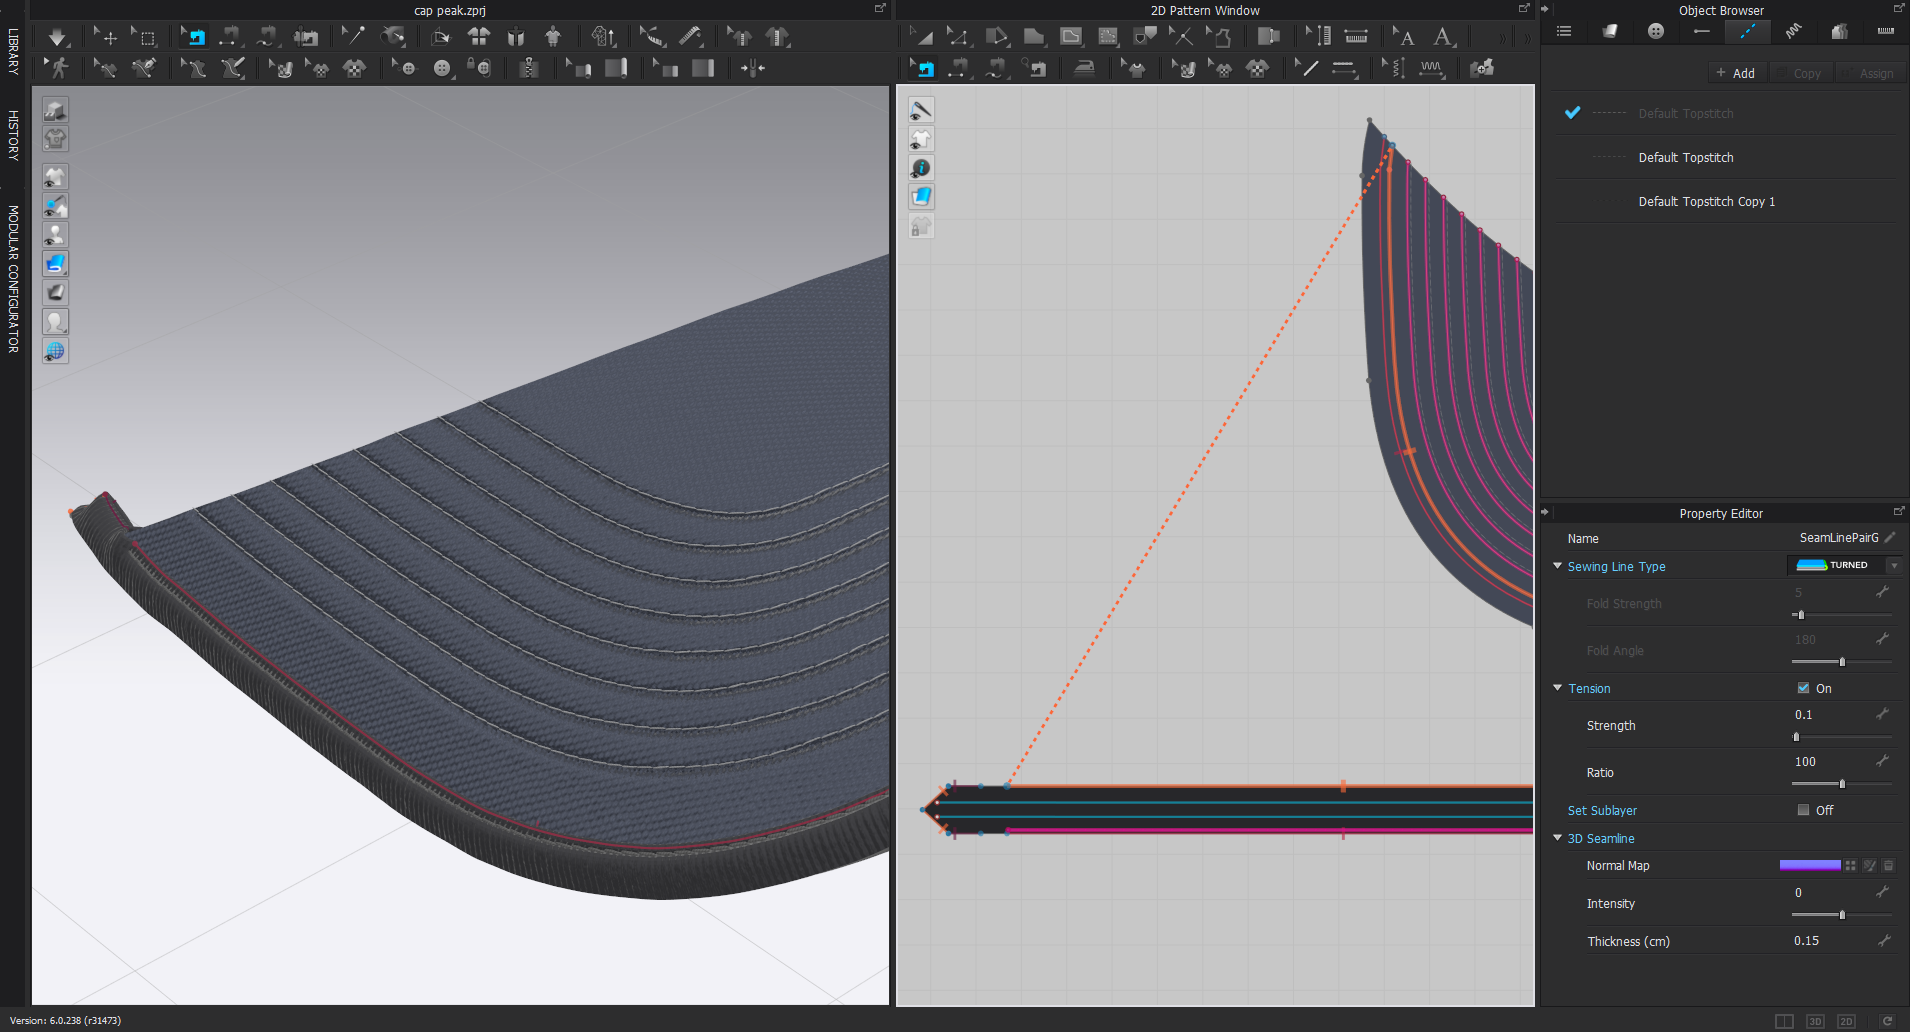
With CLO3D you are best to sew it as you would make the construction, but in that instance you should sew a rectangular strip over a thick curved brim.
If you set the cap peak (brim) to 3.4mm and the black edging pattern to 0.3mm with a curved radius edge then you should be able to comfortably wrap it around the cap brim (3.4mm) as a smooth edging. That also means you get the texture to follow the correct direction as it would be made as a product. Set the edging trim then to a very stretchy physical preset so it molds nicely around the brim when it simulates.
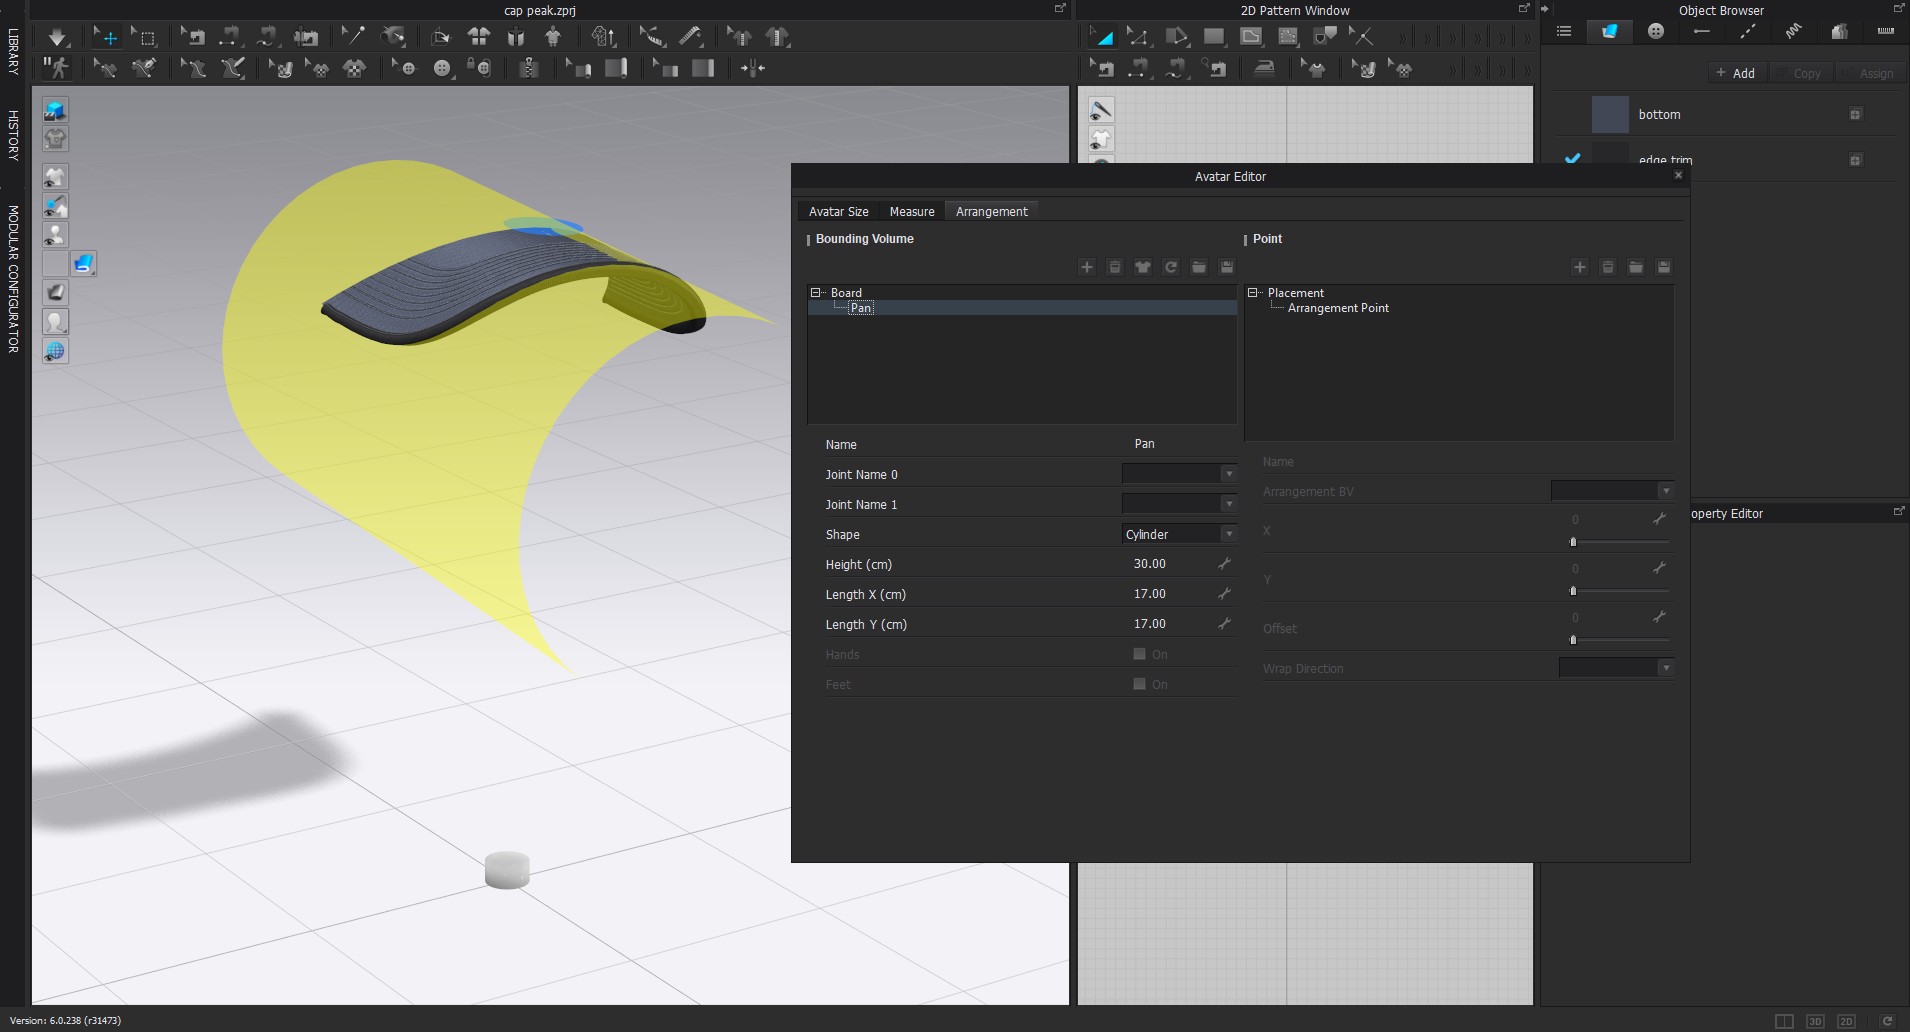
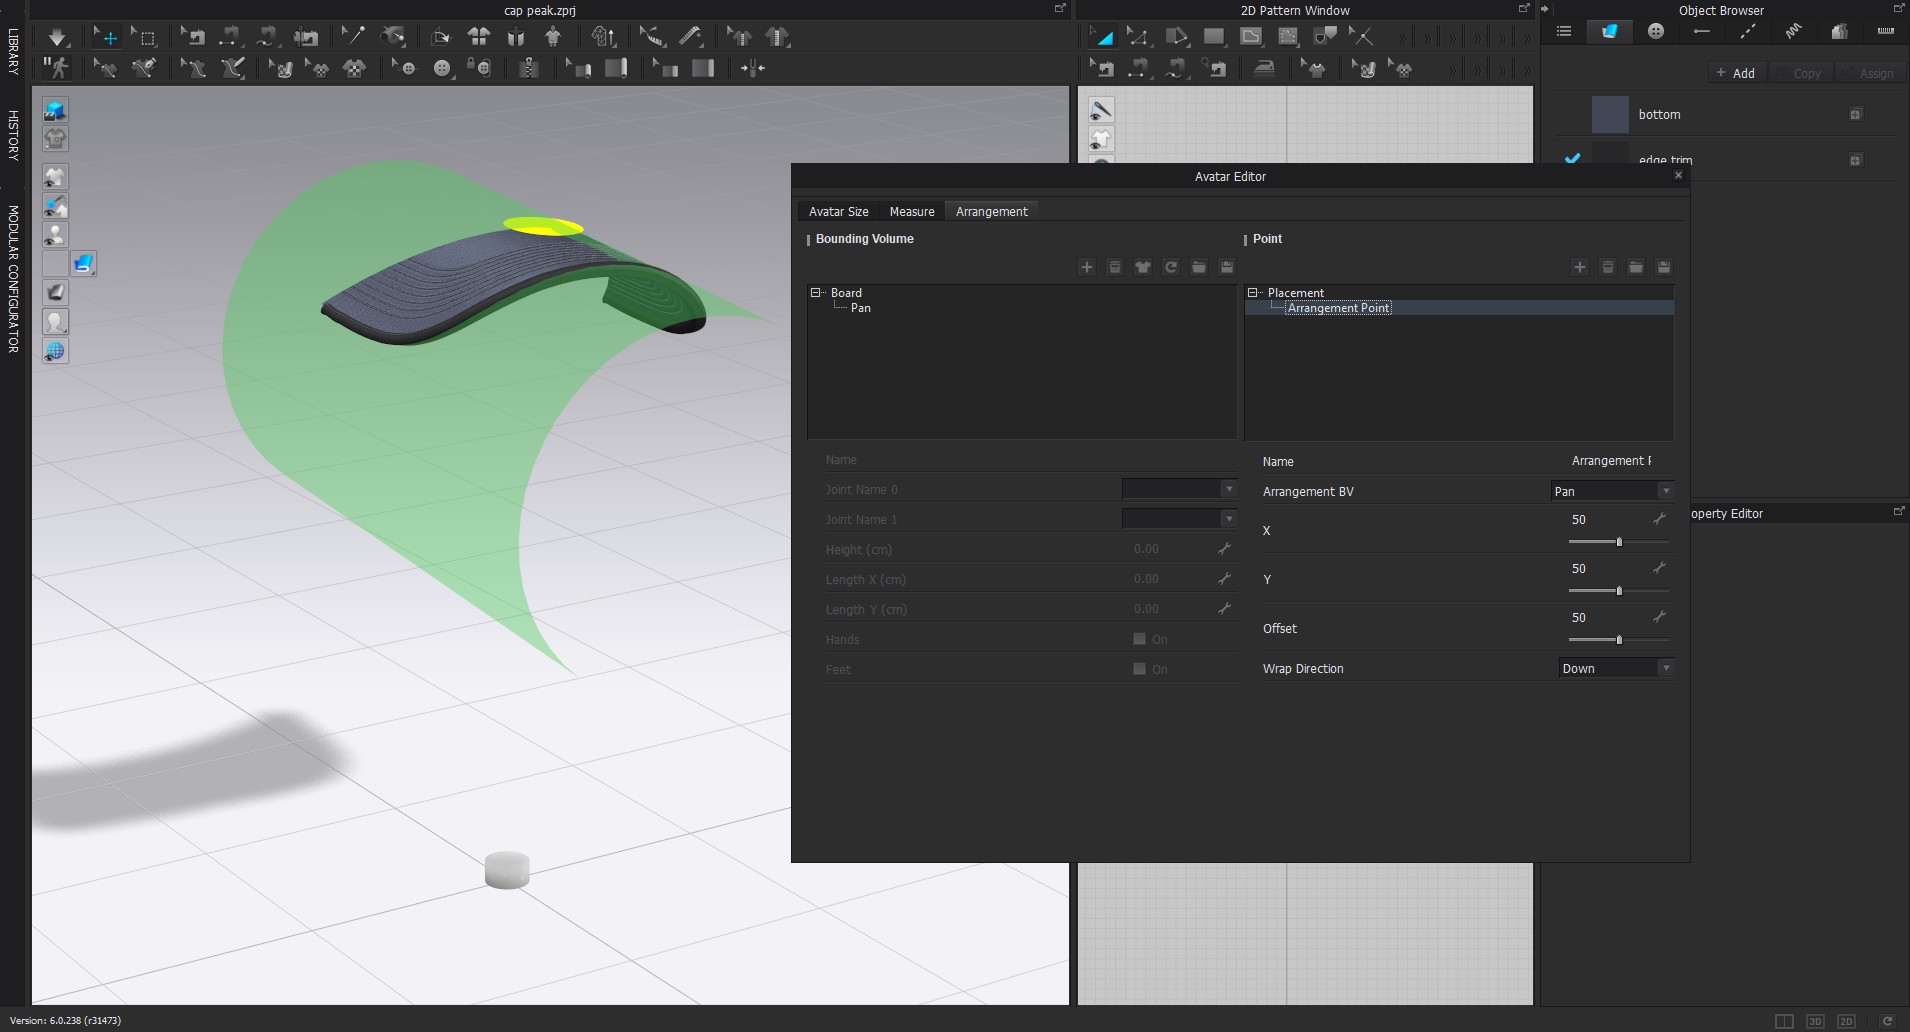
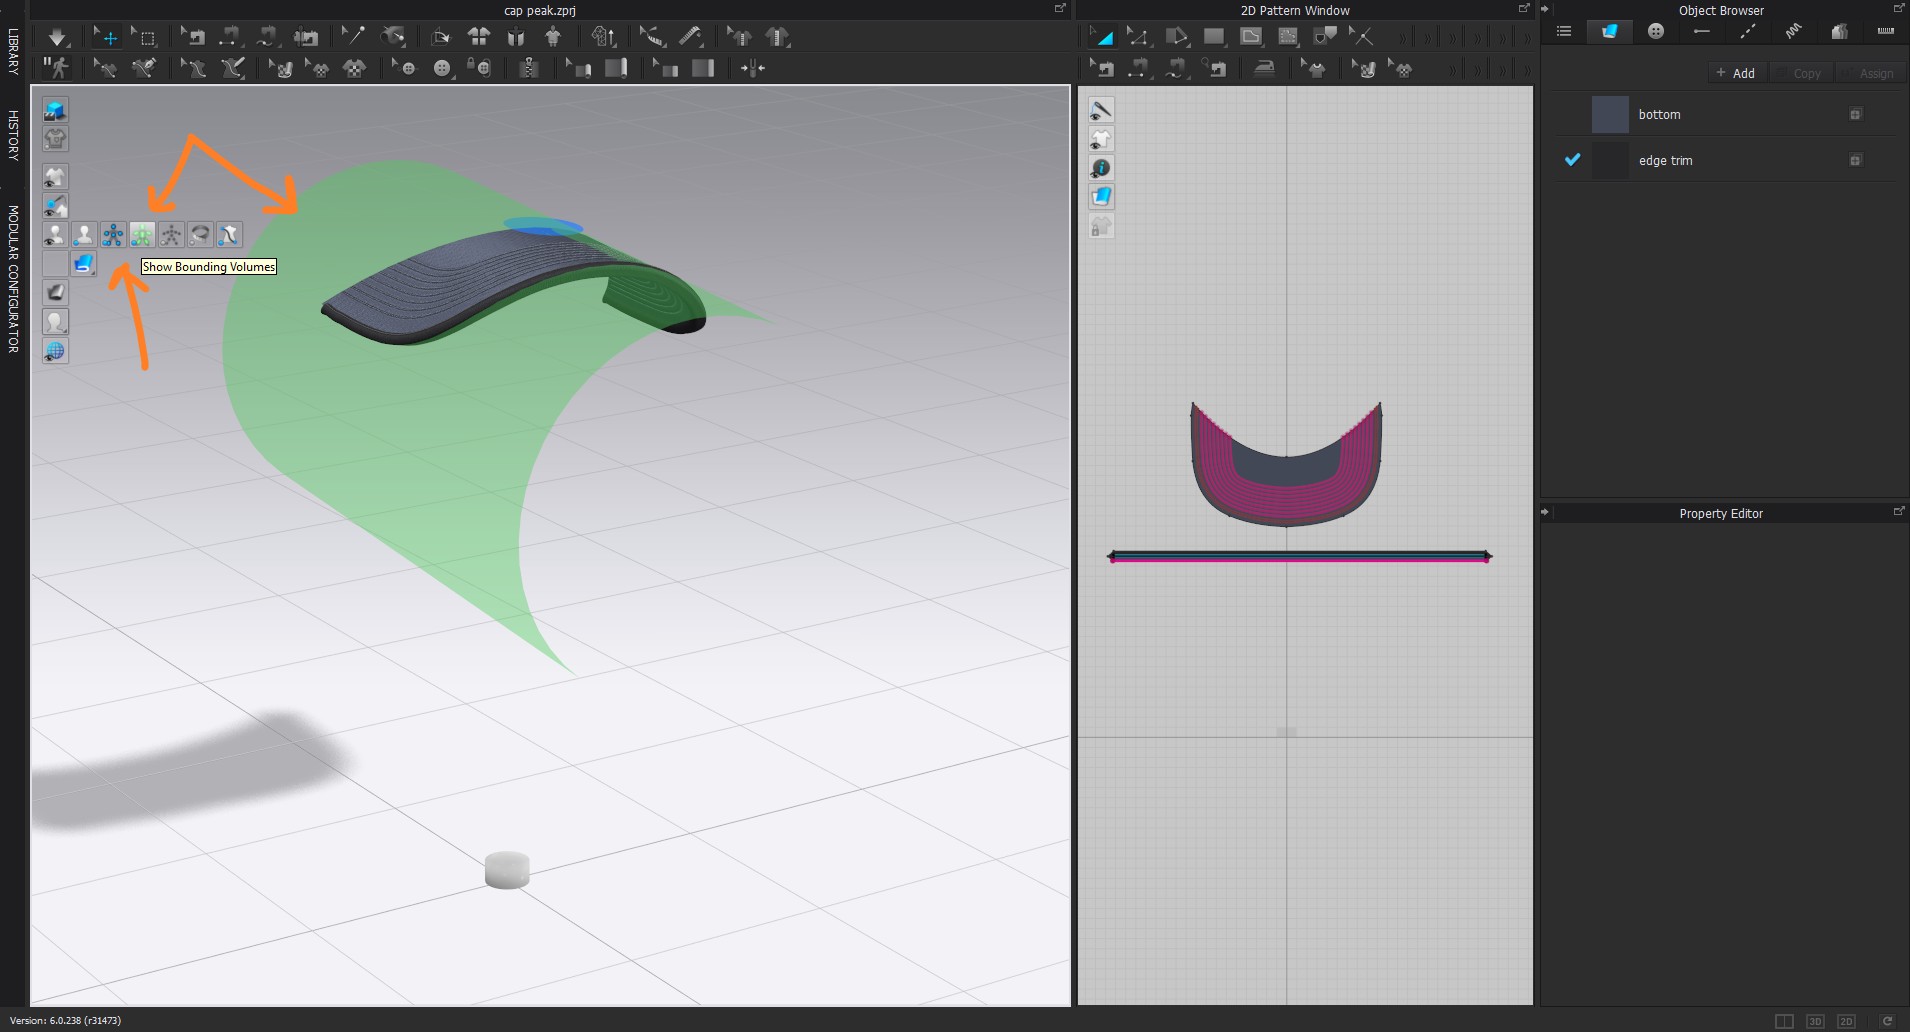
TIP: When creating cap brims you can set the cloth to custom bounding volume with arrangement point in CLO3D that will set the fabric to a absolutely smooth curvature of your diameter choosing, making it appear rigid.

Toggle off curvature on the brim leading edge,when you place your edging.Freeze the cap peak when you simulate the edging over it. Just quickly tug it into place, and give it a small particle distance 1-2mm so it is nice and smooth. I use a very stretchy fabric physical preset for binding edges.

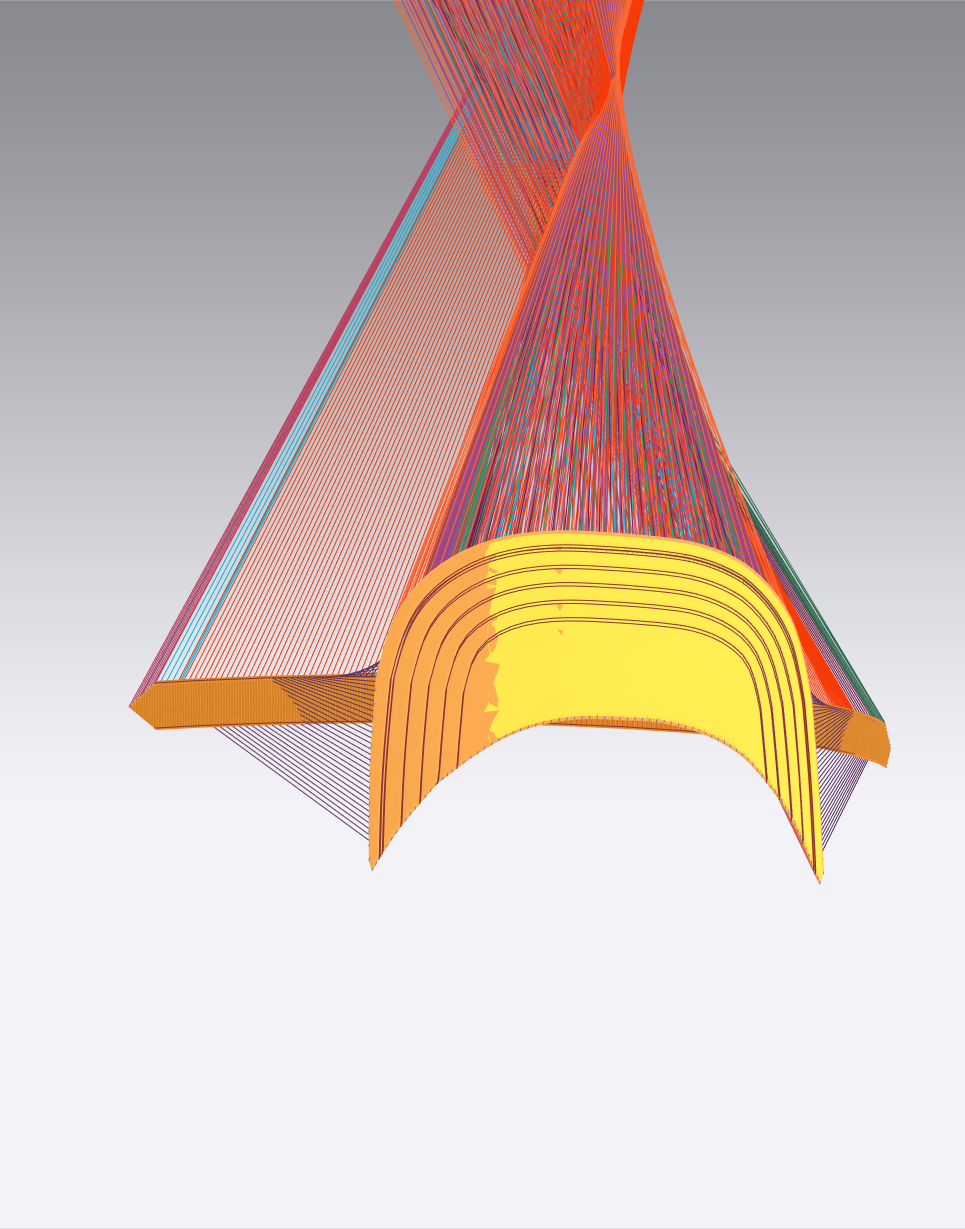
I generated a much smaller binding around the cap brim to illustrate how tight you can simulate it to the face. Given the depth of your binding that will be no problem.
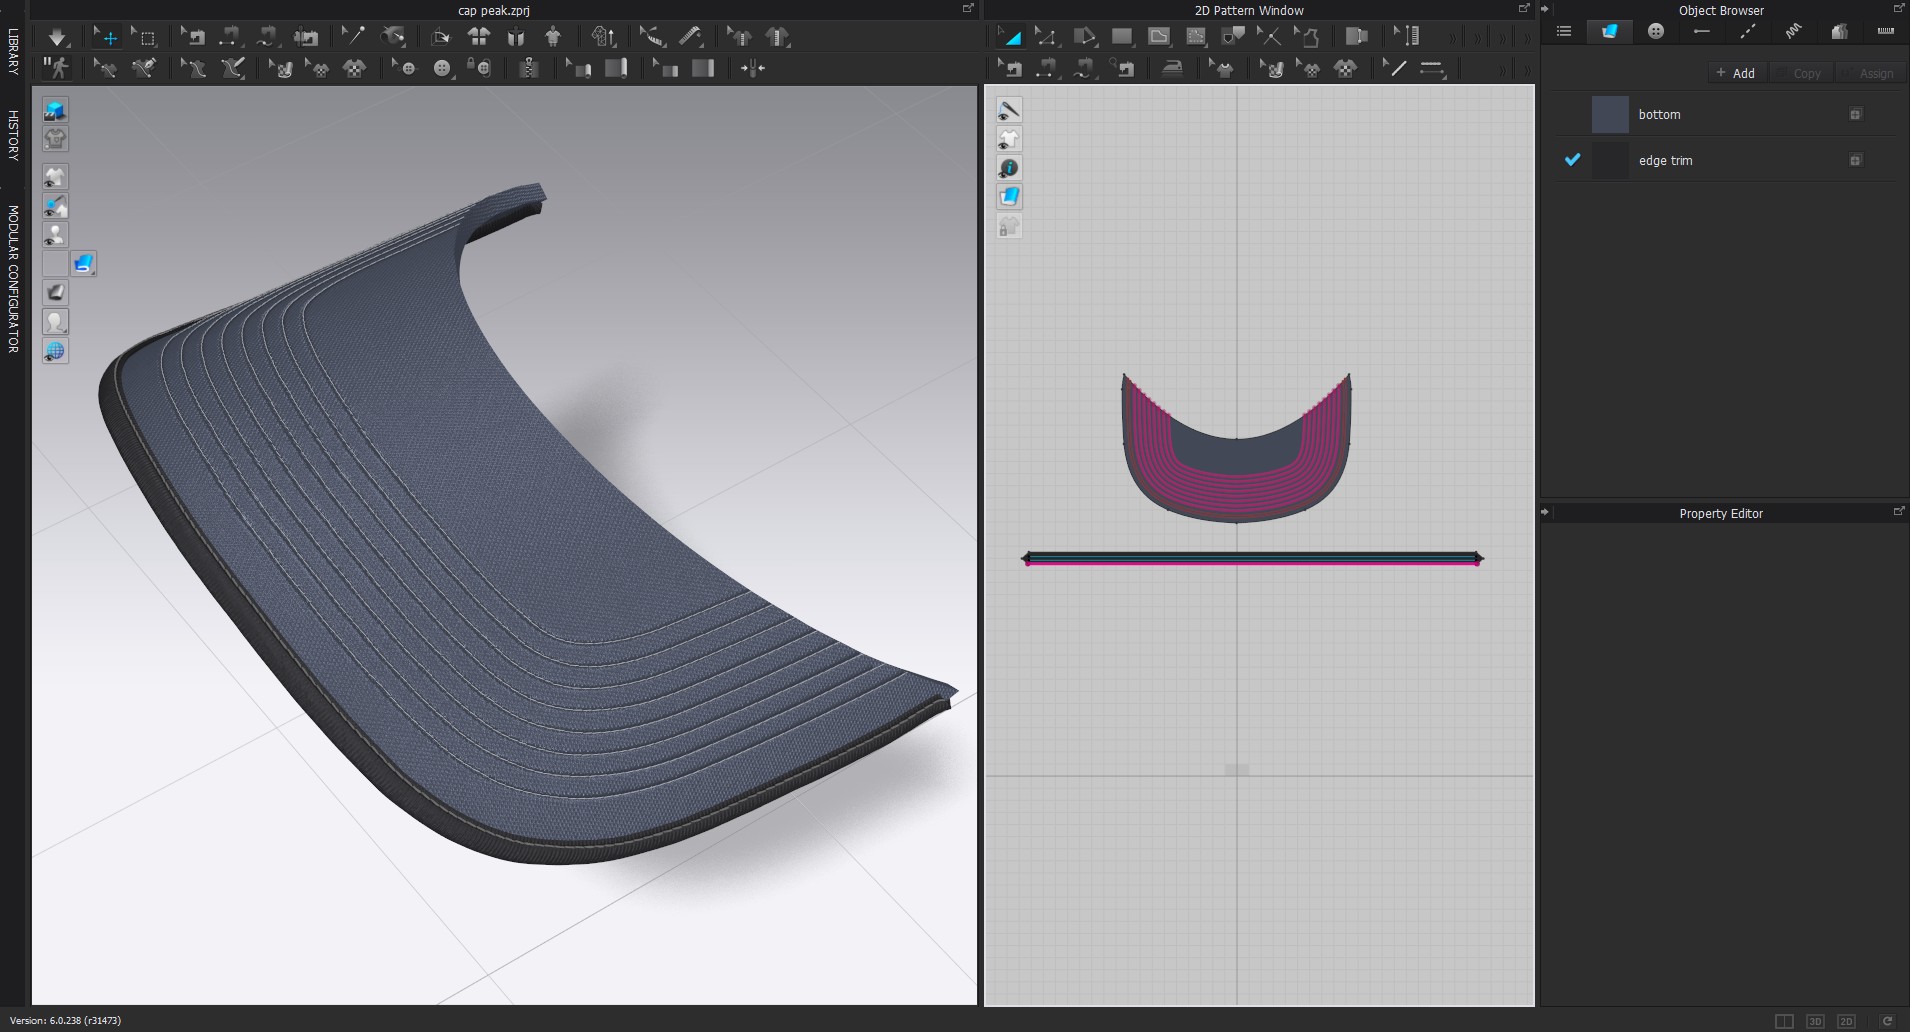
See how crisp the cap shape is as a single pattern > it is bound to a single BV (Bounding volume at a diameter of your choosing and aligned using a single custom arrangement point). Very easy way to fit the cap curvature so it's precise and smooth in a single click.
TIP : using the bounding volume to shape the cap peak shape in a single click, easily adjustable to a changed curvature.


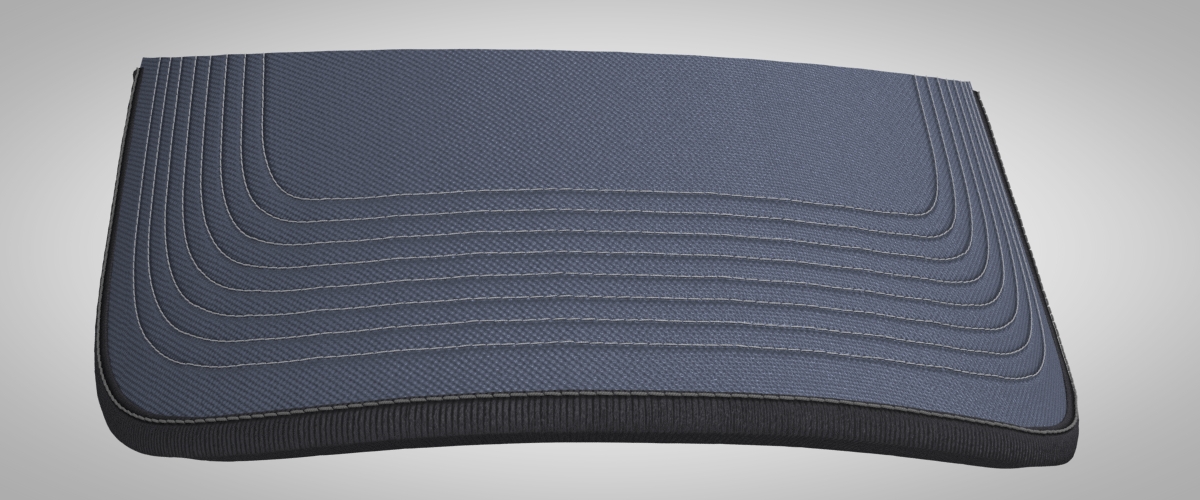
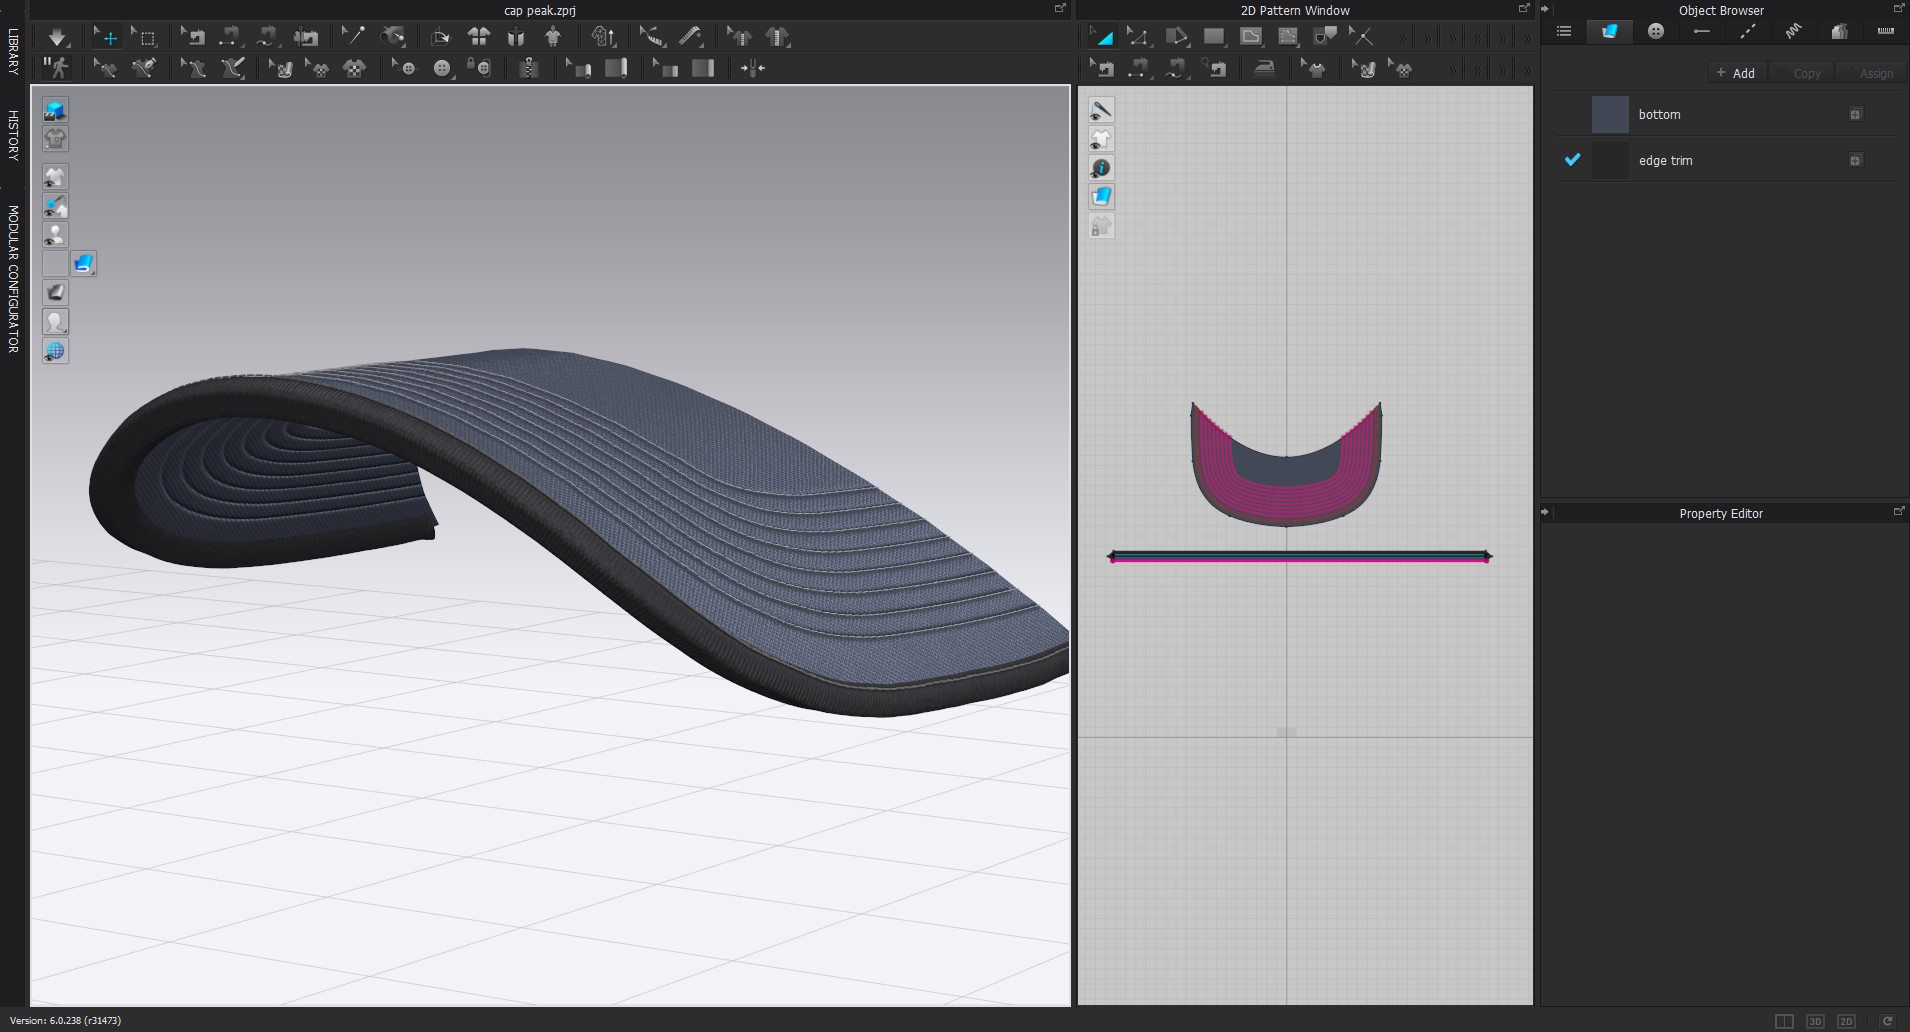
8 minutes work as most of it is just offsets from the pattern shape for the stitching. I didn't put in any pucker maps so you can see the basic construction in it's clean state.
But if you do drop in pucker maps - you can create your own custom ones to suit your seam /joint type rather than use the default ones..
1 -
Thank you so much! It looks so much better.
And what about the connection to the body of the cap? How to make it look nicer if the thickness is 3mm?
0 -
So what do I do with these parts?
 0
0 -
This is what I'm getting.
 0
0 -
 This is how the original looks like0
 -
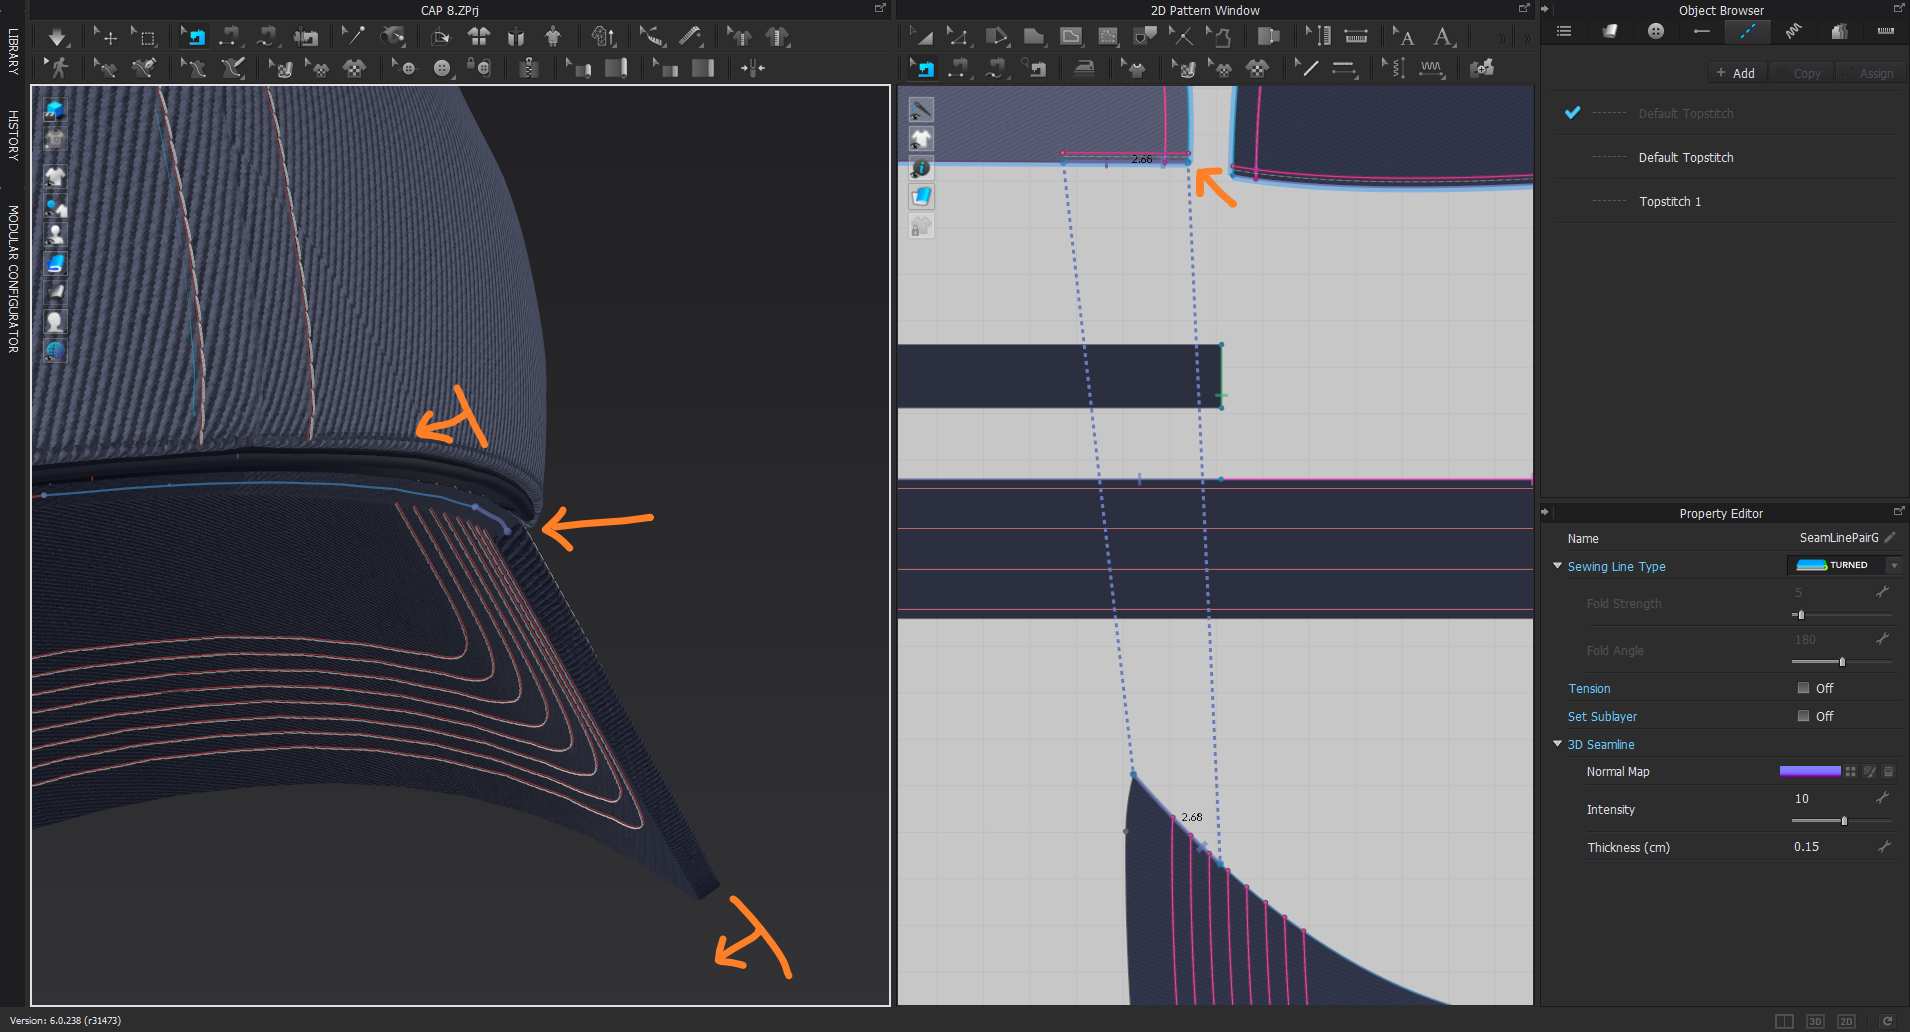
That transition can be a little tricky - make the peak top surface sit down a bit (same as in the photo) - see how I do that, it will make the transition a lot better in that area - yours is sitting up by the thickness making it difficult for you to make that detail sail under the cap rim. See my example below.
I would extend the brim tape just beyond the peak say 5-10 mm past the inside of the cap (stitching it together) , and then stitch it to the inside of the 25mm tape that is usually folded up and that runs around the inside of the cap. Then you can hide that extra length in that area. See how that extra piece inside the cap helps create a nice seam for the outside parts of the cap to sew onto around the head. Basically the same construction as it is made. My peak is sewn to sit inboard > see views below to show it better. That's the basic construction for most caps.

See how I make my cap peak sit inside by it's thickness.
Don't forget the tape that folds up inside the cap.

See how I sew all the tape inside the cap.

And note how I use layers to get the order for the tape right between pieces

It's pretty simple construction as you can see only a few parts - just as it is made. When you do that all the seams and stitching follow the real hat and it usually simulates that same as a real cap.
So maybe make the trim go off the end and place it between the inside tape layer that runs around the head (or nip it flush) and you will never see it.
Hope that helps.
0 -
ottoline Please, help!
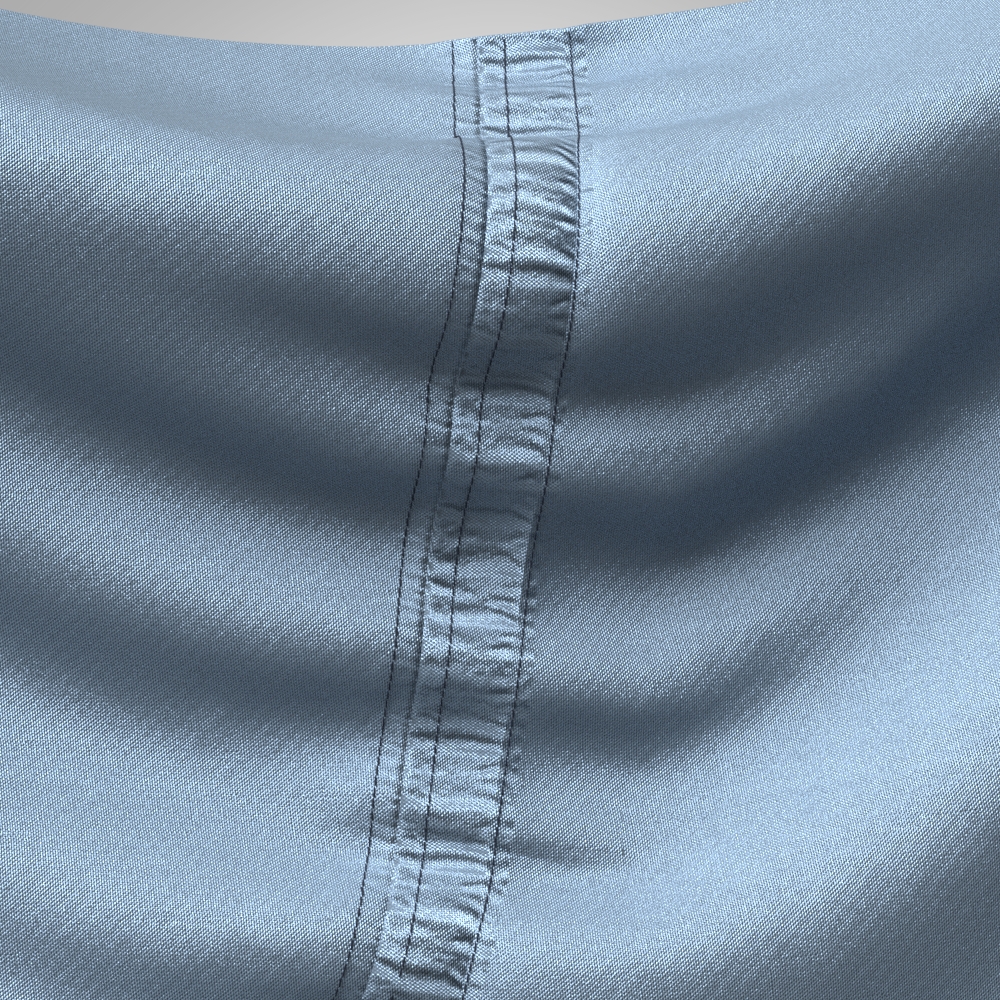
I solved the previous problem a bit differently. Was not easy though... I had to make a brim from three parts. And added thickness to the middle one. So I stitched top layer to the cap and the bottom layer to the sweatband. And to hide the corners took me a lot of time, but finally, I did it and it's even stable! :)

But now I need to do one more cap with a curved brim. And when I try to place it on the arrangement points, then the edge of the brim is going off the edge.
 0
0 -
Not sure what you mean > the edge is going off the edge ? Isn't there only one edge ? Can you show the BV and arrangement point with the cap peak brim with a screen capture so I can see what is going on.
You previous edge taping looks good by the way. :-)
0
Comentários