How to make fabric wich creases/brittle a lot? Like aluminium or mylar?

Hello
how to make a fabric which creases, very brittle (but without displacment map), like aluminium or mylar?
🙄
-
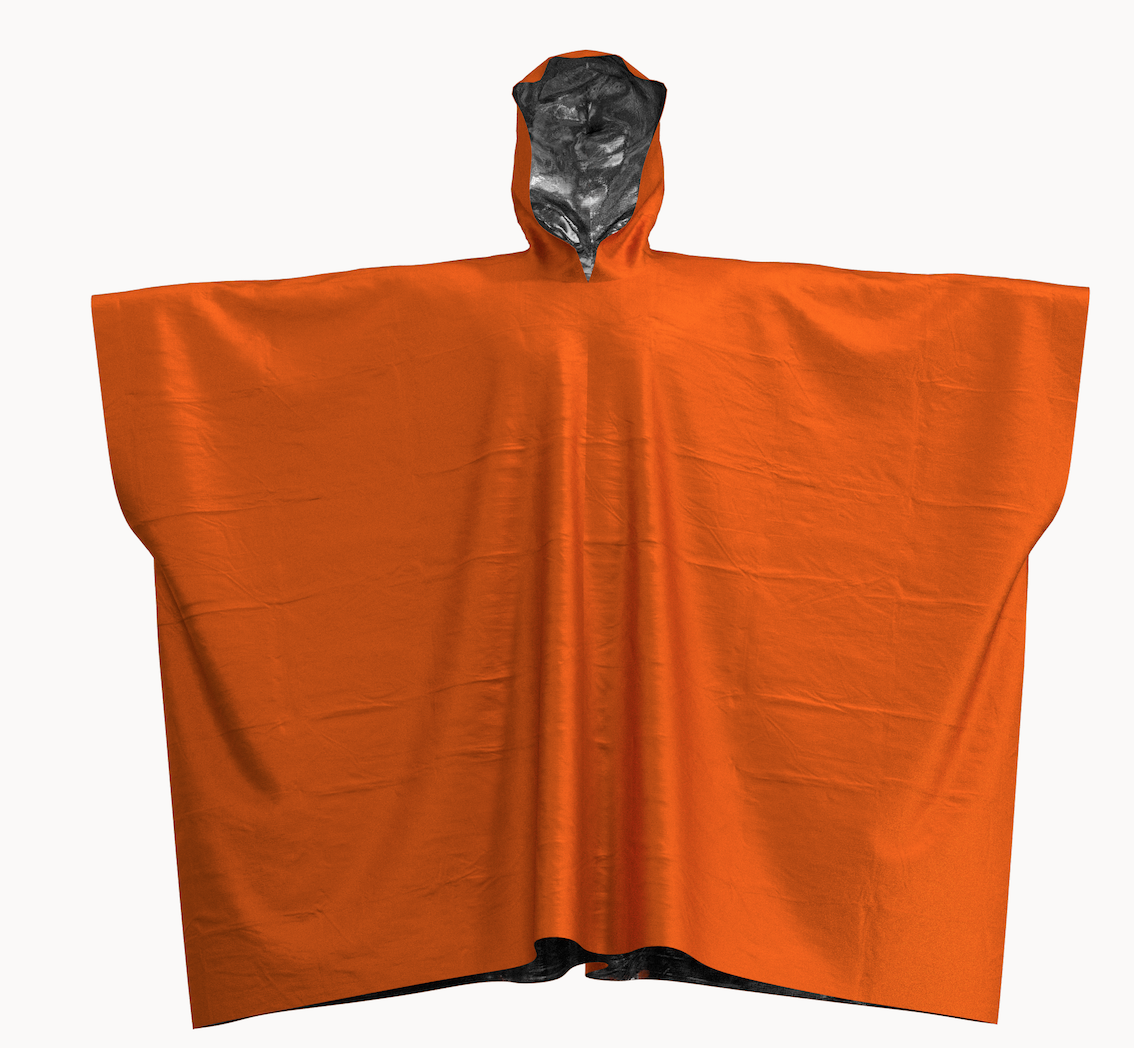
Check this one I made. I used a normal map of a crinkled material.
Check it here:
https://www.poliigon.com/texture/fabric-tarp-plastic-001
 1
1 -
Pretty thank you ;-)
But I would like a fabric who naturally crumple/brittle. Is-there a way to do this?
0 -
The general concept is that you can find a material which is similar to what you are after if you look for in different PBR sites.
0 -
Yes I understand well, that's a real way to work, but I want a live move, a fabric who brittle during the movment...
0 -
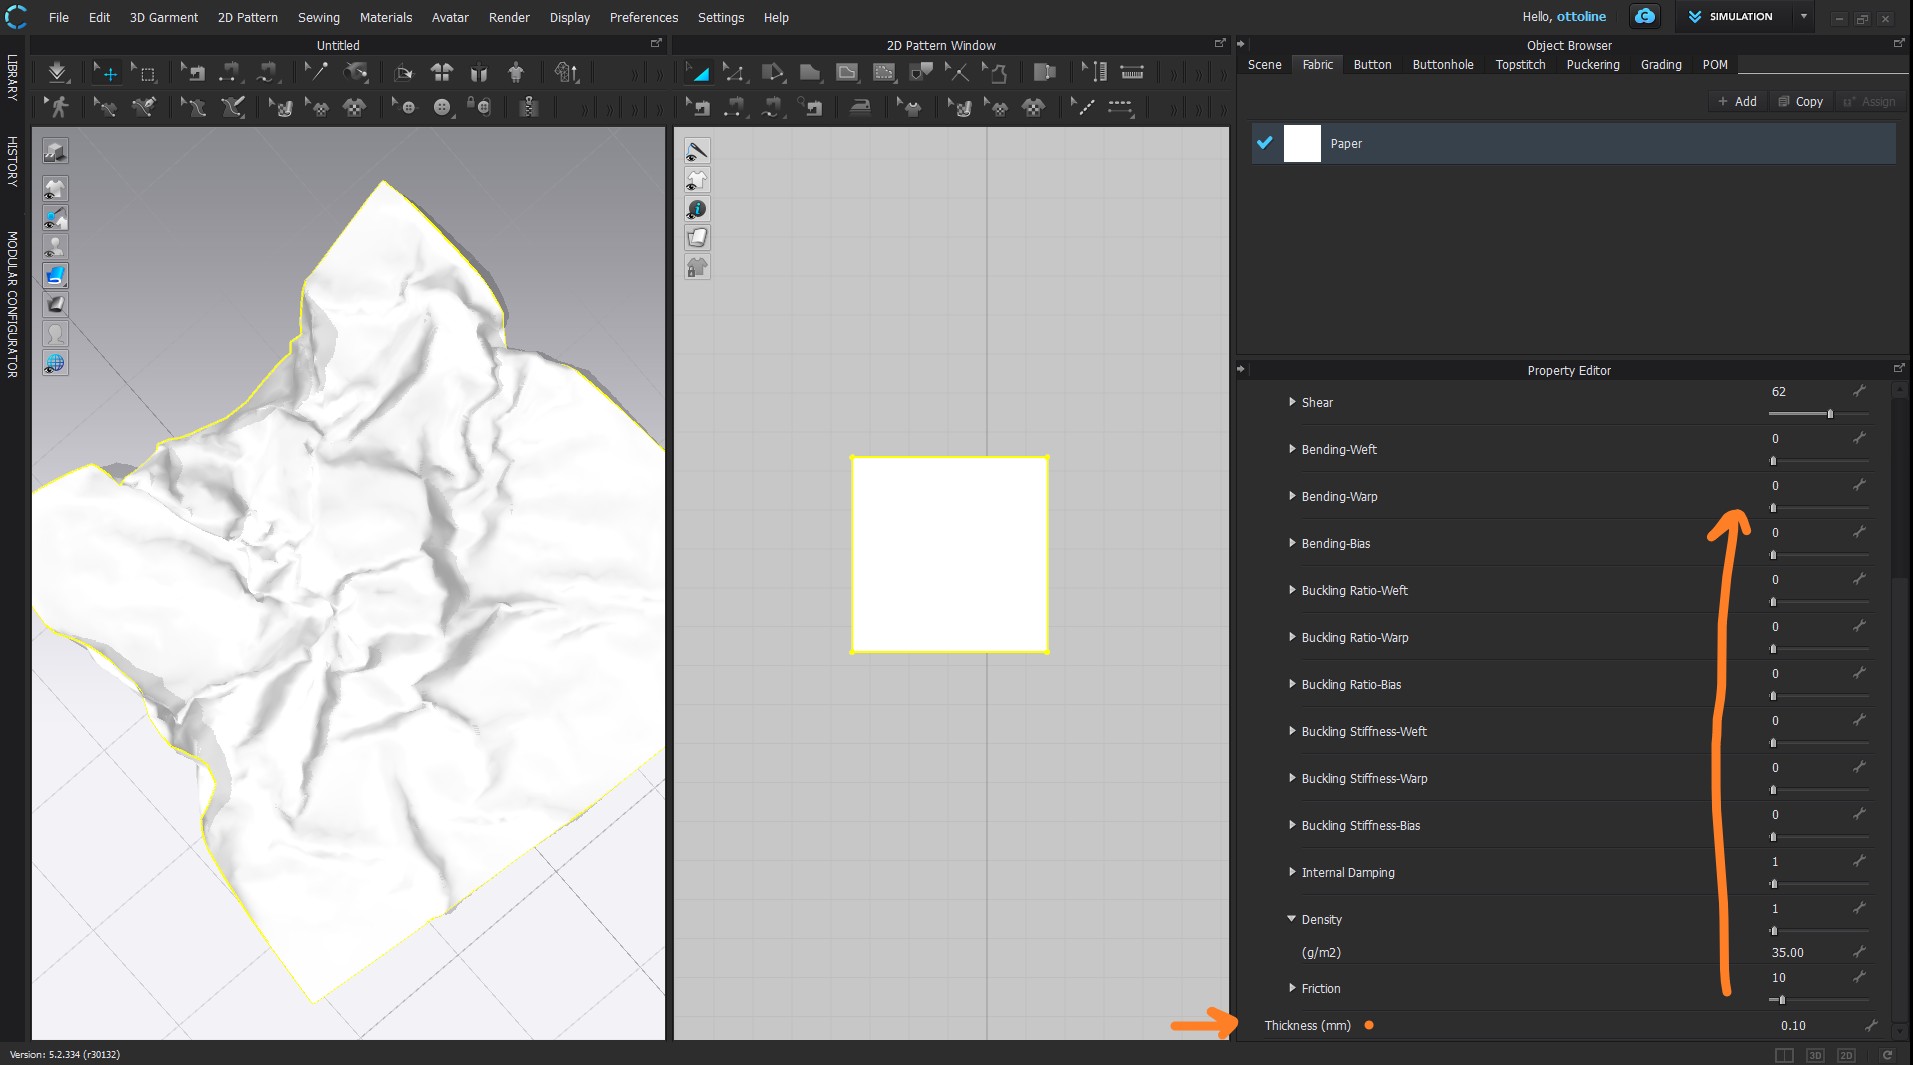
You can change the fabrics physical preset values and create a custom one.(start with feather weight nylon and adjust down from there). The lower you go the more creasy and stiff the physical preset will get.

So start with a light weight creasy fabric - nylon and work down from there till you get what you want. You can change the density (weight factor) to better reflect your materials weight.
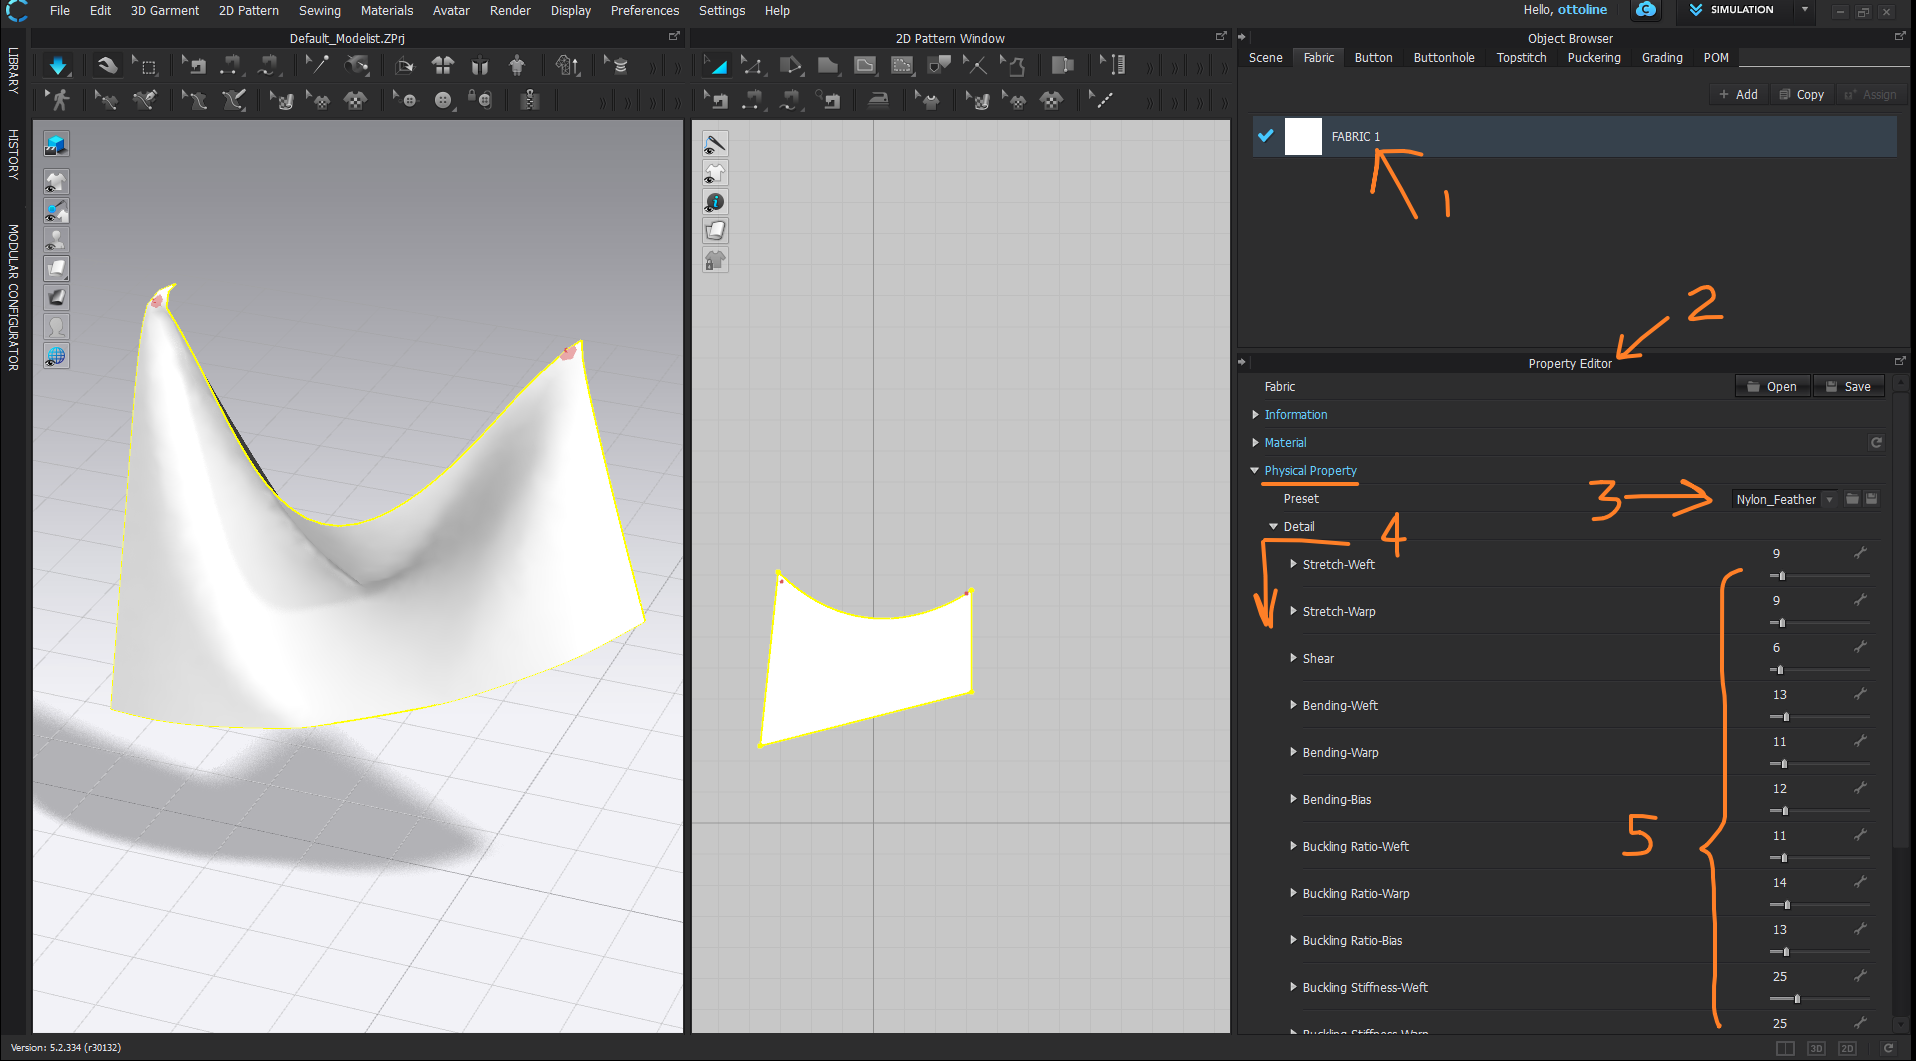
You can manually input a value > expand each physical preset (triangle) and then input a value. eg: weight (just get a bit of material and weight it on digital scales, and divide by its measured area to get that approximate value) - or look it up on the internet and input that factor for g/m2.

I'd be careful with creasing that is baked in if you want a natural feel as you would also need to check the normal textures have the light angles from the right direction on the creases - a problem on many textures sites as they don't check them when they actually make them, they just stamp in random creases at any light angle mixing it all up and it becomes an unnatural mess.
Always best to simply make your own crease maps, simple quick and cheap ands then 100% able to rely on your own skill.

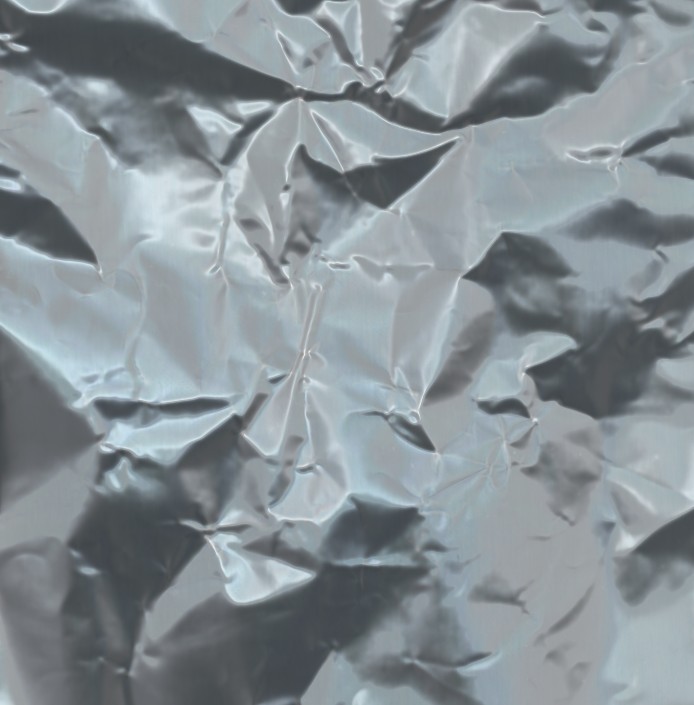
These are all tissue paper creases, take under 3 min to make. And you can get what you want when you want.
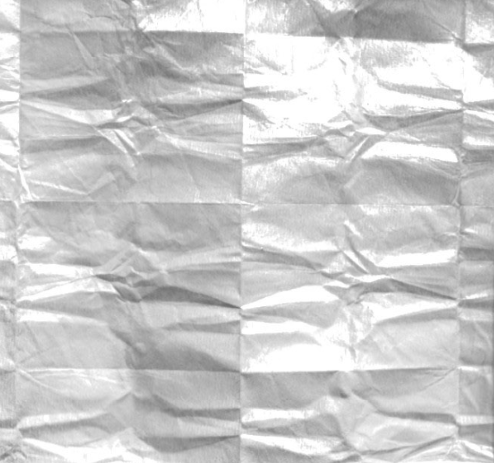
Mix and match to any detail level.
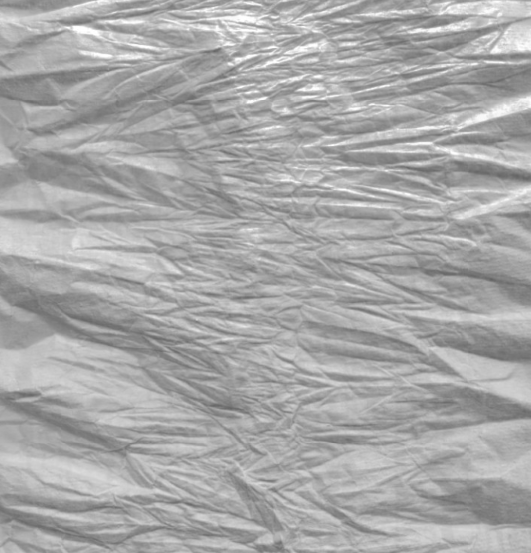
And alloy/ foils are just as easy, flick on a matting spray to make that a little more easy.
You can then play with depth and source light once you have the texture into maps. For the albedo value (metals and mylar foils) check out the standard vray values here >> metal Albedo values for metallic materials

I've done quite a few satellite CG effects over the years, so I would typically use this type of approach to create many of my crease materials, and even have some high tech mylar I snookered from an old project for the real thing, which ends up with some special optical coatings that will change how a material will light. Best done in the OSL shader if you want custom light frequencies at the surface for diffraction - vray will handle that in a very specific way - so beware what render engine you use and how you break down your shader.
For plastic creases you need a polarized filter as you will get a diffraction component but otherwise the same process. Quite easy to do.

You can make your own crease maps in about 5 minutes, just use tissue paper, crease it and digitize it, and then slap your fabric normal tile over that blended mix, then you get what you want and can keep all the light angles technically correct.

Above my plastic physical preset is simply the light nylon, and then reduced about 50% on all slider settings from that preset position. eg: 13 becomes 6 / 10 becomes 5 / and so on down the slider list - and weight (density) is the actual materials true weight (g) per meter square of material area. That's it- pretty simple stuff.
Good luck. Hope that helps.
1 -
if that helps you said !? Ouch, that's impressive! You really rock Ottoline !
I don't really understand the first diagram/picture but I have used the preset that you put on picture 2 and 3 (nylon base + change) and the result seems interesting...
0 -
Ottoline is there a way to contact you? I don't see how to send private message on the forum?
0 -
I am in lock down at the moment due to this bug going into overdrive city-wide but are very busy with a digital fashion show + filming going into hyper drive across the ditch at the moment. Thankfully lockdown is on a beautiful white sandy beach with great (surfing) .... exercise.
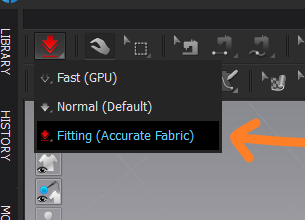
Below a basic start paper preset, you can adjust in CLO3D, set the simulation quality to CPU and Fitting (Accurate Fabric) and for a 50cm area make the mesh density at 20 or 15mm. A simulation trick is to start the simulation off, then stop the simulation and then change the particle distance down by 5mm and briefly (a short burst) start the simulation again, this has the effect of reducing the creasing radii on the paper if you want a slightly softer look, like you might get with thin plastic.
Below 'Crumpled' paper preset for approx 50cm start area > particle distance 15-20mm > tri mesh > fitting sim

Set simulation to Fitting (accurate fabric)
So those are my tips.
0 -
ottoline These tips are great, thank you!
How can I add polarized filter?
0 -
Generally a polarized filter happens on the light source and then also the camera > cross polarization. If your camera has focus sensors it may need to have a circular polarized filter so the focus and light meter exposure sensors don't get effected. Otherwise standard linear polarising filter gels (for lights) are readily available from most specialist photography camera supplies.
0
Comentários