particle distance

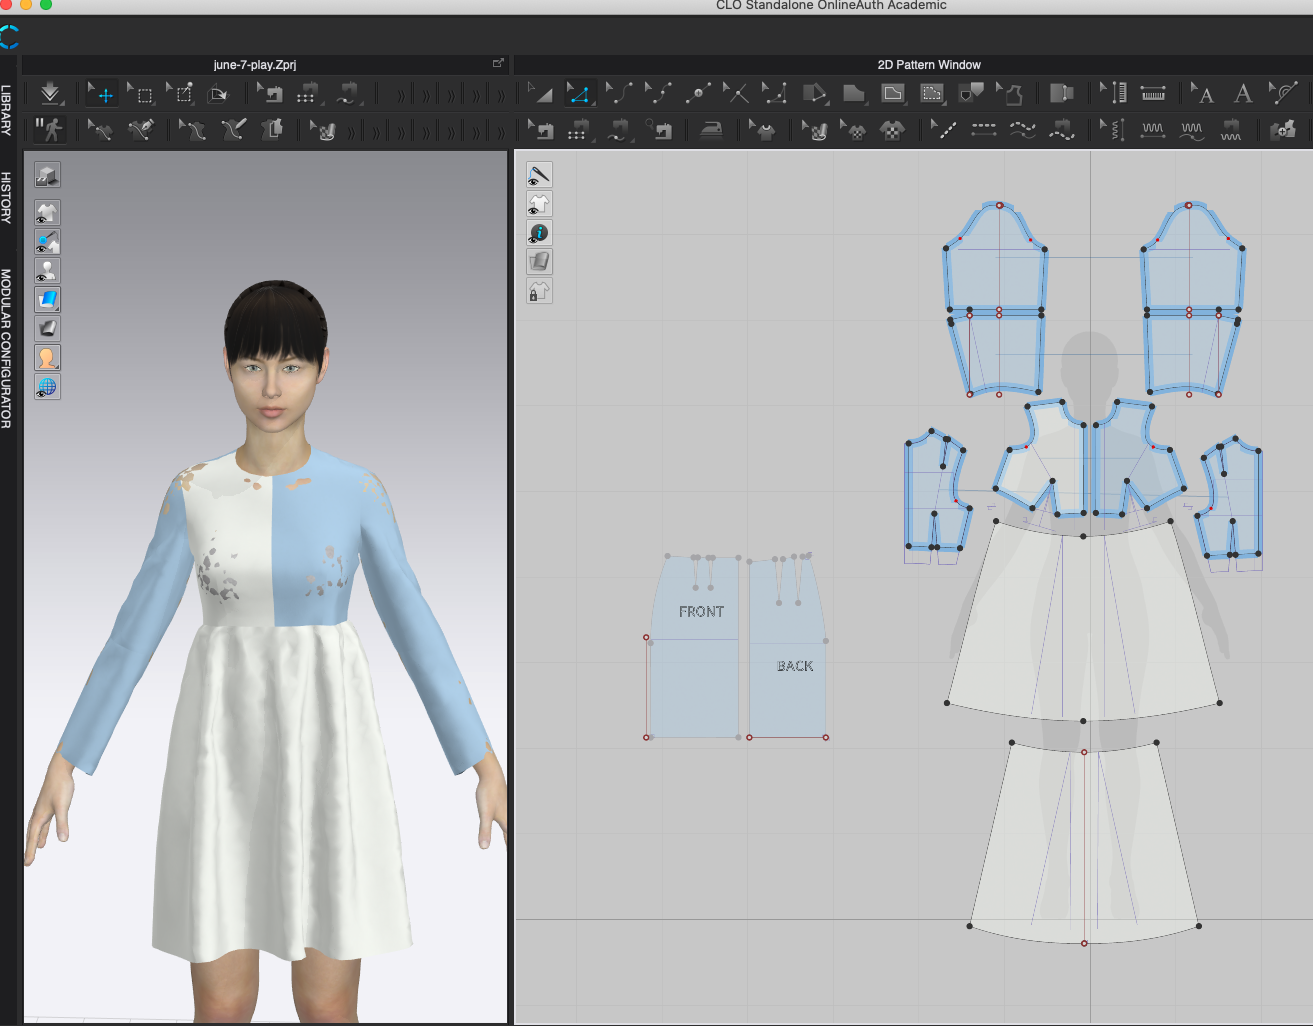
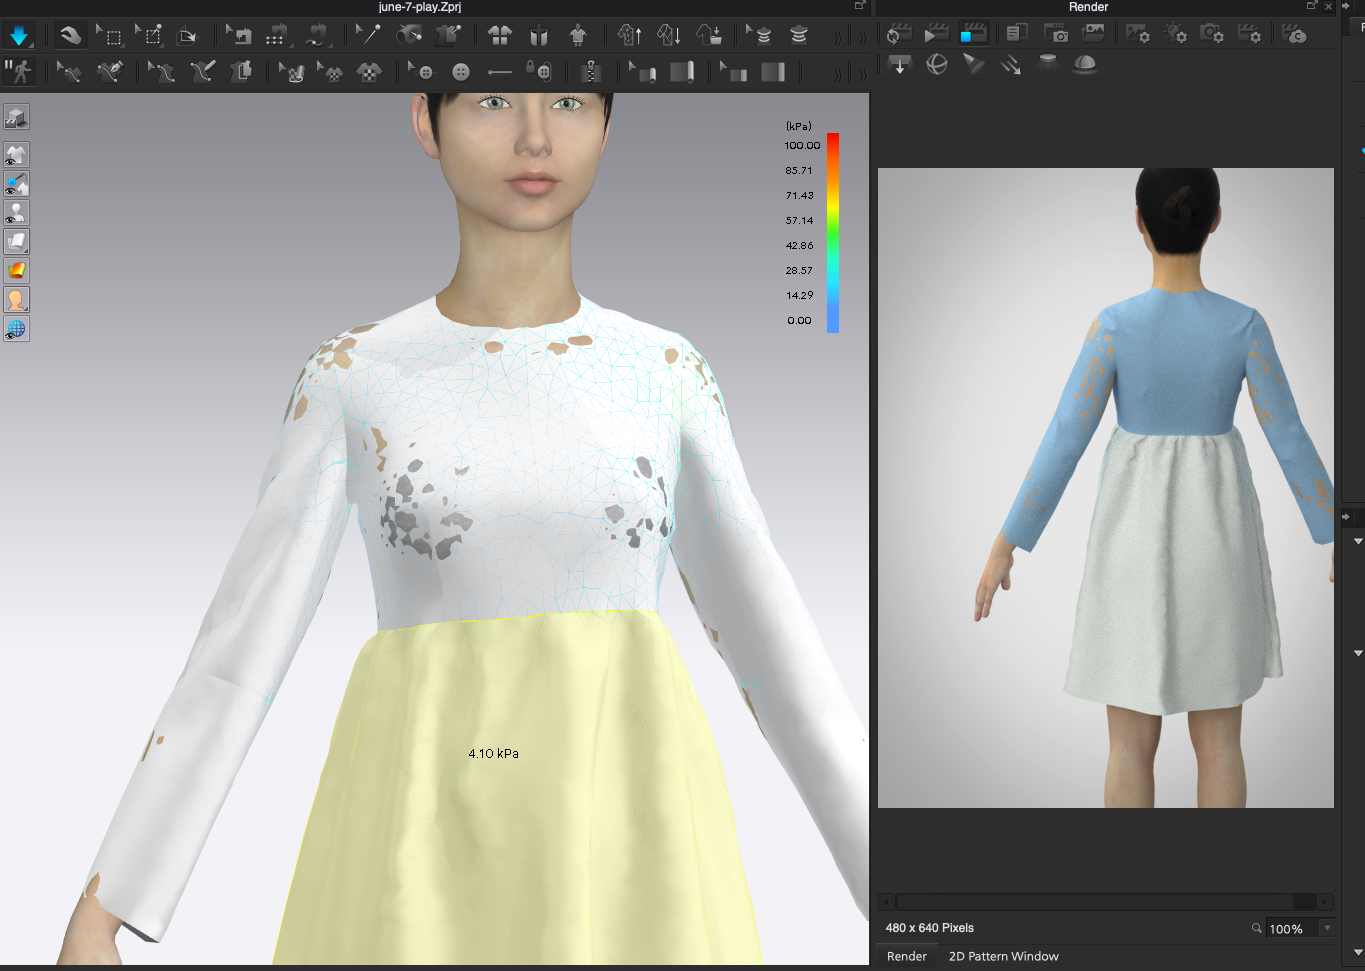
I originally changed the particle distance to 7 but now I would like to continue to edit this pattern. I brought the particle distance back up to 20 but I keep getting these strange holes in the 3d view port and the render window. Ive tried to switch out the fabric material as well. Any thoughts for how I could fix this?
-
I should also say that I have previously checked fit and it did not appear tight. Everything is reading in the blue kPa.
 0
0 -
Check your avatar skin distance offset (the default is 3mm).
0 -
Just simulate again and make sure you are using Thick Textured View, The problem is only visual (maybe a bug). It is not actually creating holes in your gament by intersecting the avatar.
0 -
It's called 'poke through' and yes it's a physical problem with two varying mesh distances sat one on top of the other. Basically when you position a thin mesh (triangular face) over a quad (avatar) face you get tangents based on where the vertex points sit relative to the face as the edges traverse compound curves -relative to the segment length that can follow a curve. This cause a poke through of some vertexes (and consequently the render planes that make up faces) that sit slightly out of sync between the random position of the two simulated meshes (one the cloth garment) the other the avatar. When you simulate you therefore have a control setting for each element > the avatar and the cloth - it is this setting that governs the distance between the surface mesh for both elements. To avoid 'poke through' of the vertex of either mesh set a a small tolerance (collision offset) on your cloth and avatar to maintain a distance that avoids the vertex poke through. That is good practice in CG mesh, because when you come to animate or render or export your scene you may need to add in thickness modifiers to solve that issue you could avoid in CLO3D earlier for thin mesh.

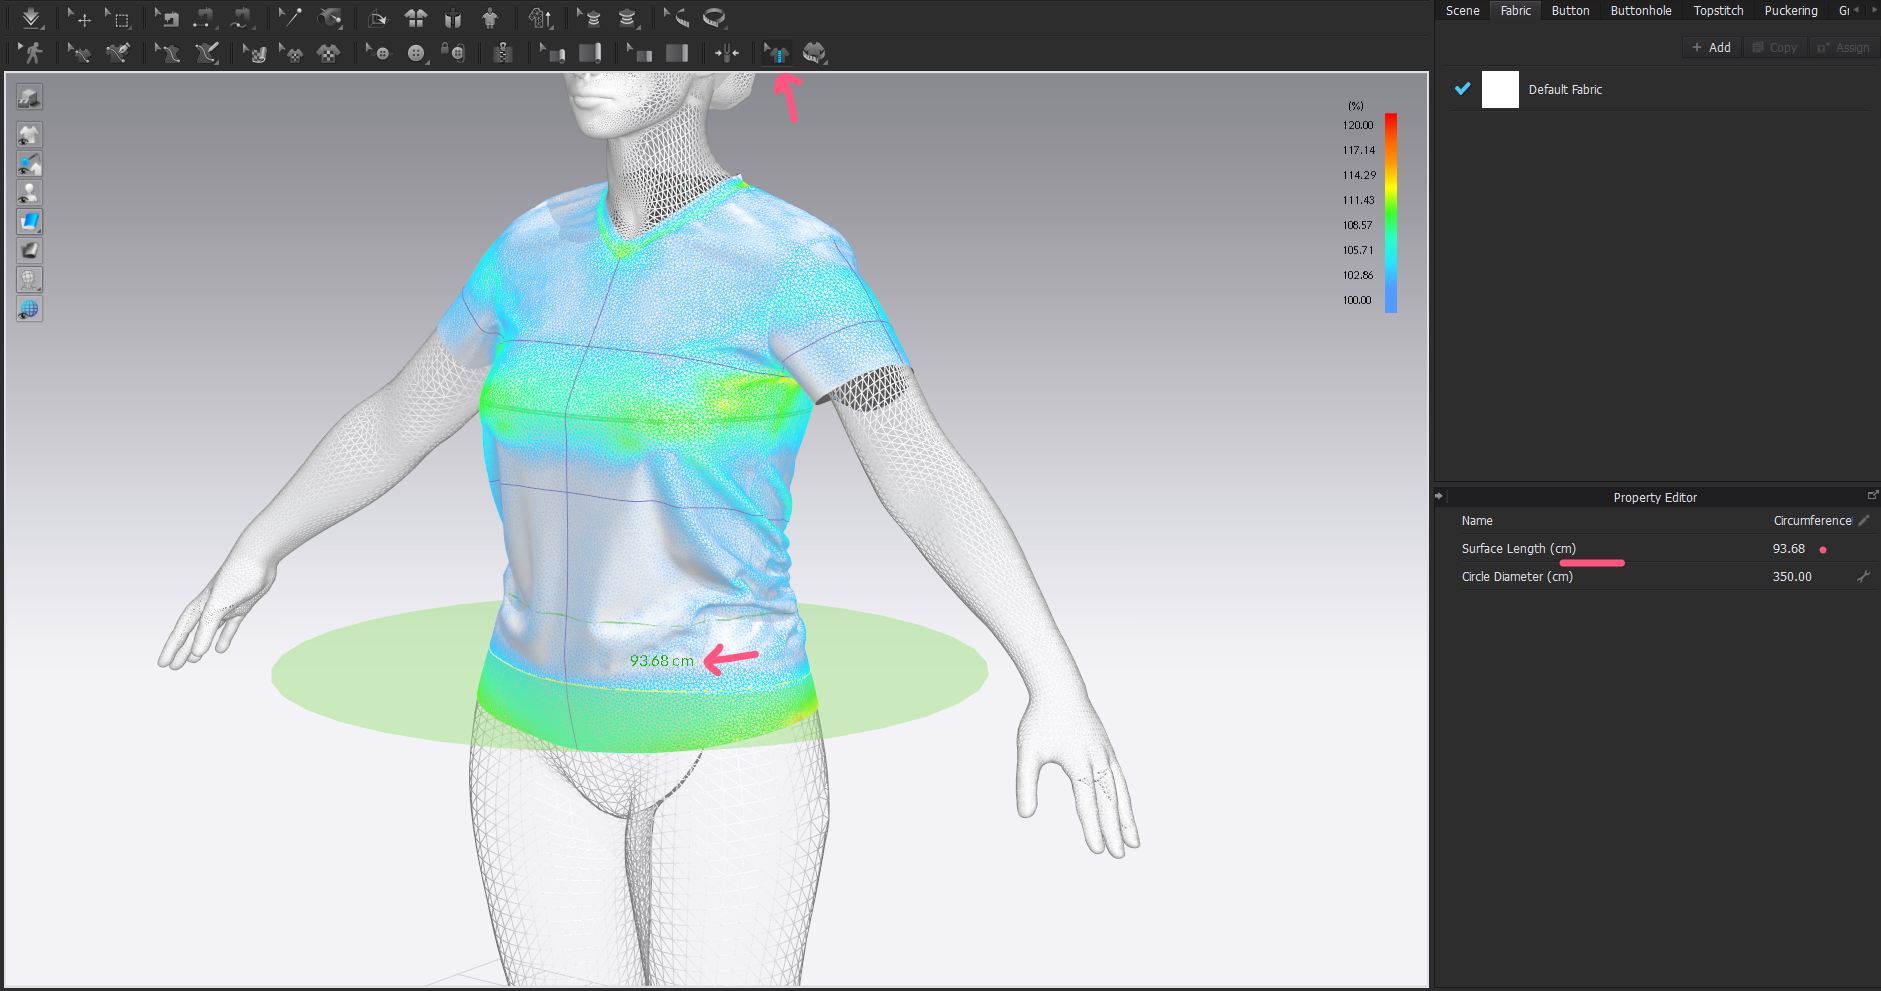
The default settings (20mm particle cloth distance with 2.5mm collision + 3mm avatar offset) are maybe a bit too much gap in some visual renders between the skin and garment, but also realize the CLO3D strain and stress is based on using the default settings, which means if you change that you may also change the nature of the simulated 'fit', based on avatar size, which could have a consequence on your garment sample. It's true to say - this does matter when considering 'ease' distance, and why CLO3D have the cross sectional tape tool to check these girths between garment and avatar.
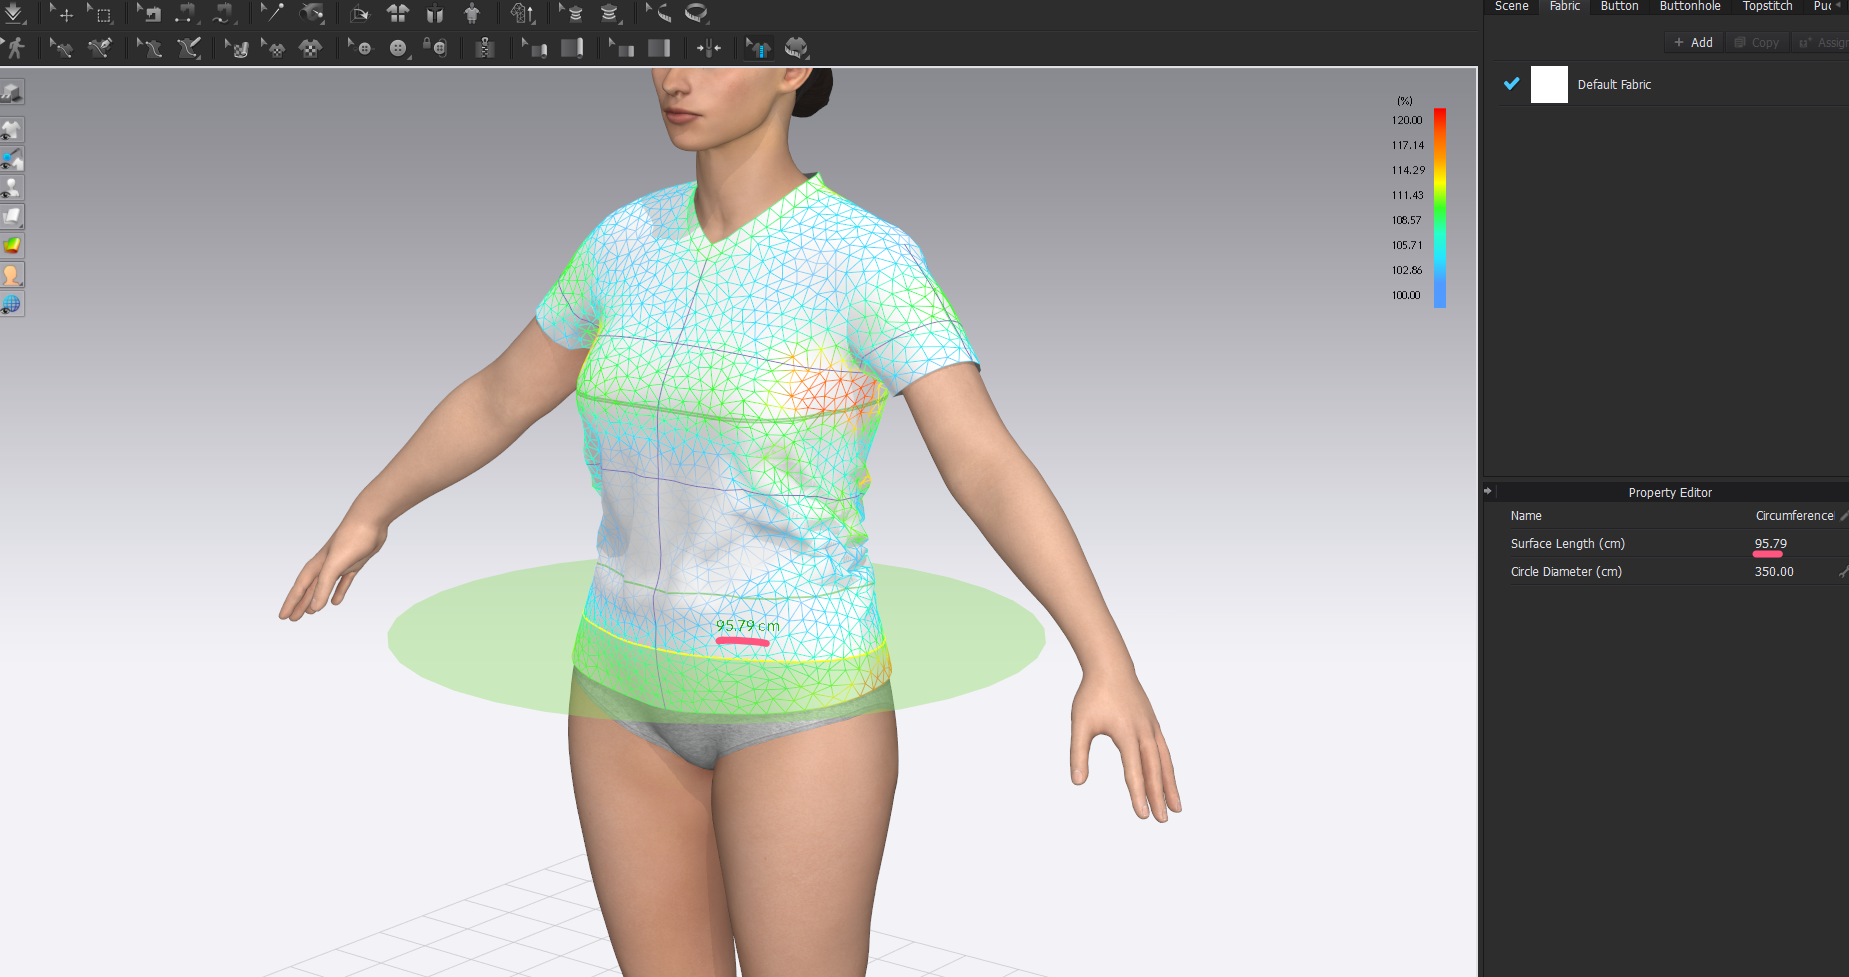
Quite a mis-match here in tolerance, so I would want to lower that error.
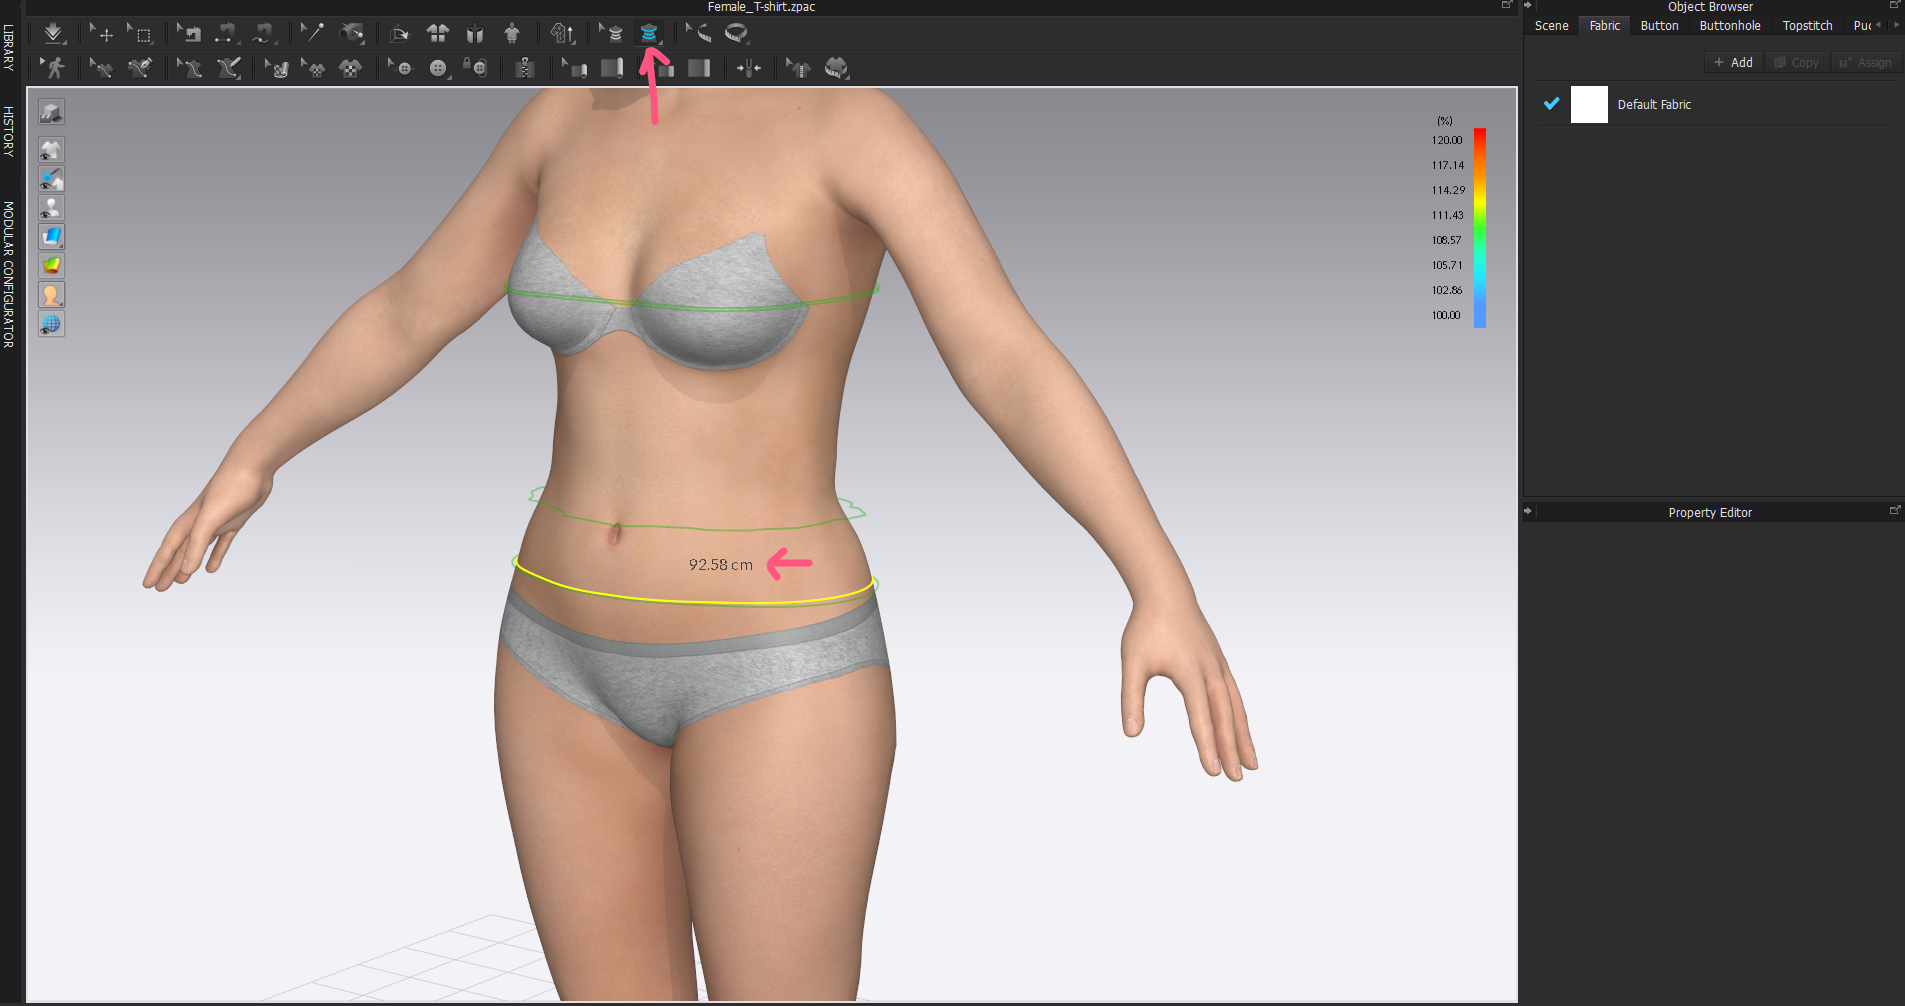
So setting the avatar mesh to be slightly above (bigger) the pitch of the cloth means you should avoid poke through, and setting your skin offset to match closely to your garment will avoid poke through and give you dimensions in your sample fit that are more tightly toleranced - together.
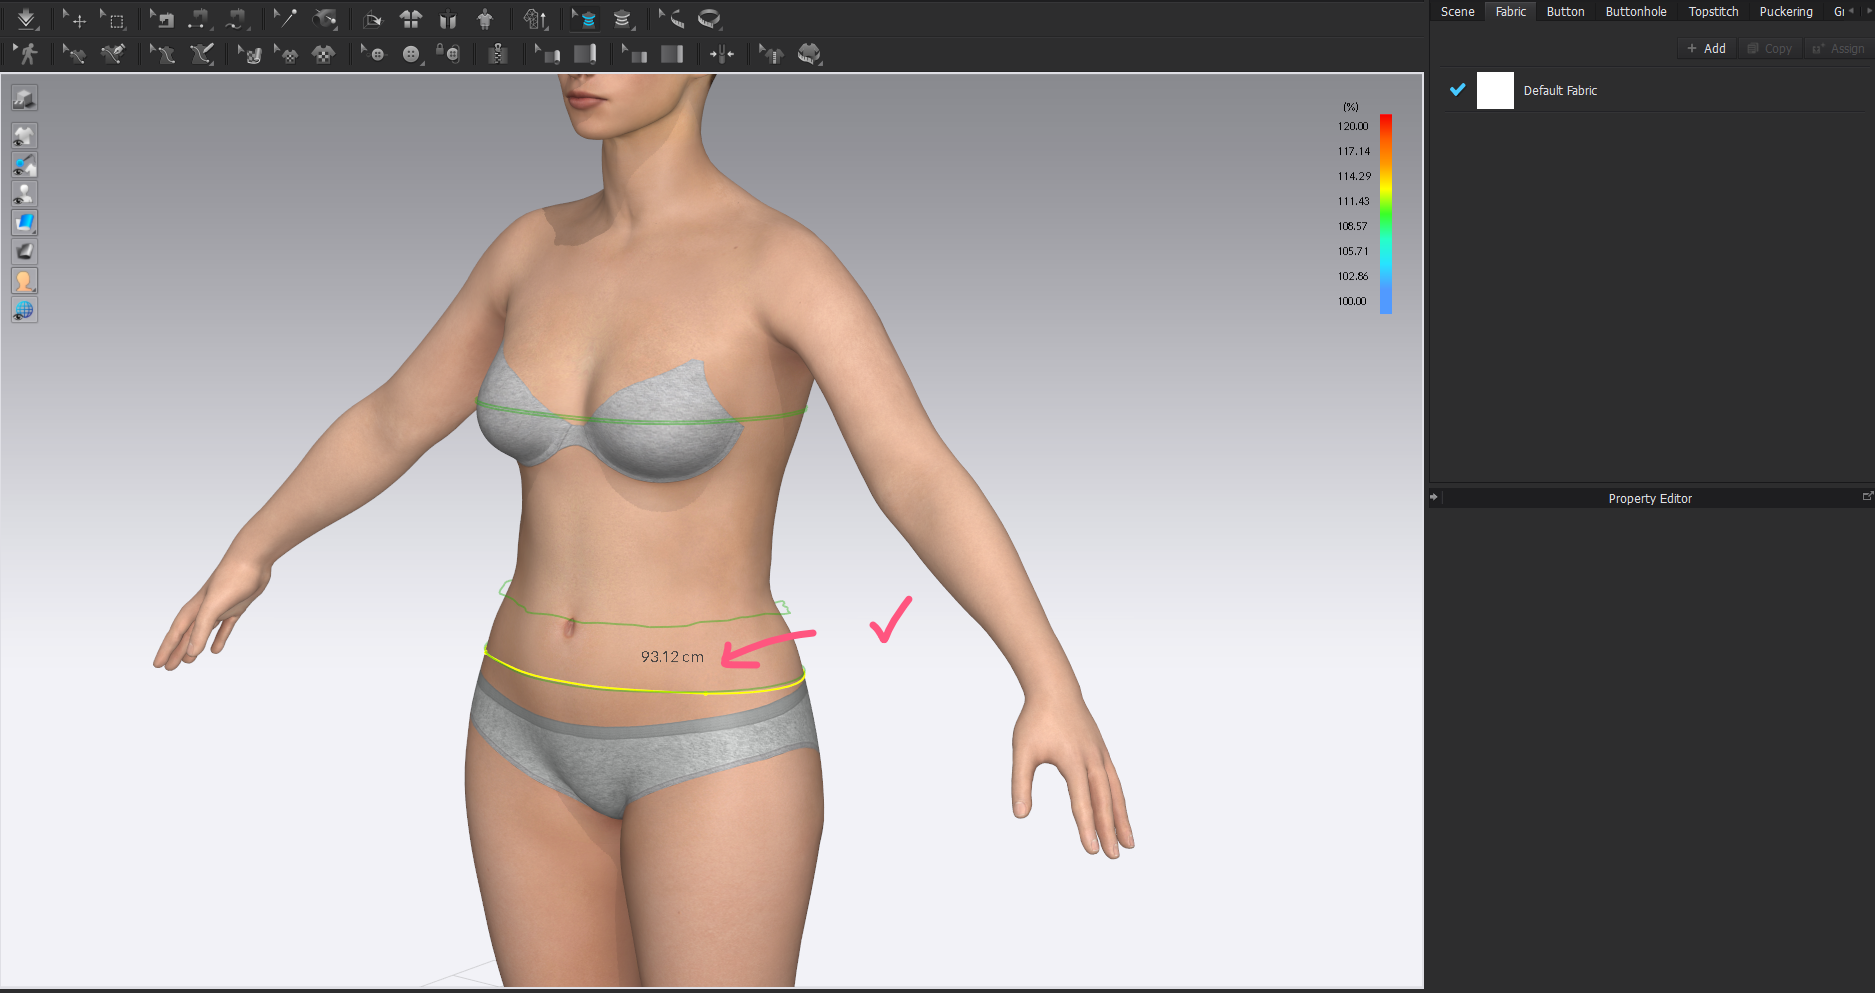
A much tighter tolerance between these two measure now. Rendering the strain/fit/stress results much closer to the body size.
Avoiding poke through and visually keeping the garment close to the skin, with a better tolerance across the assembly.
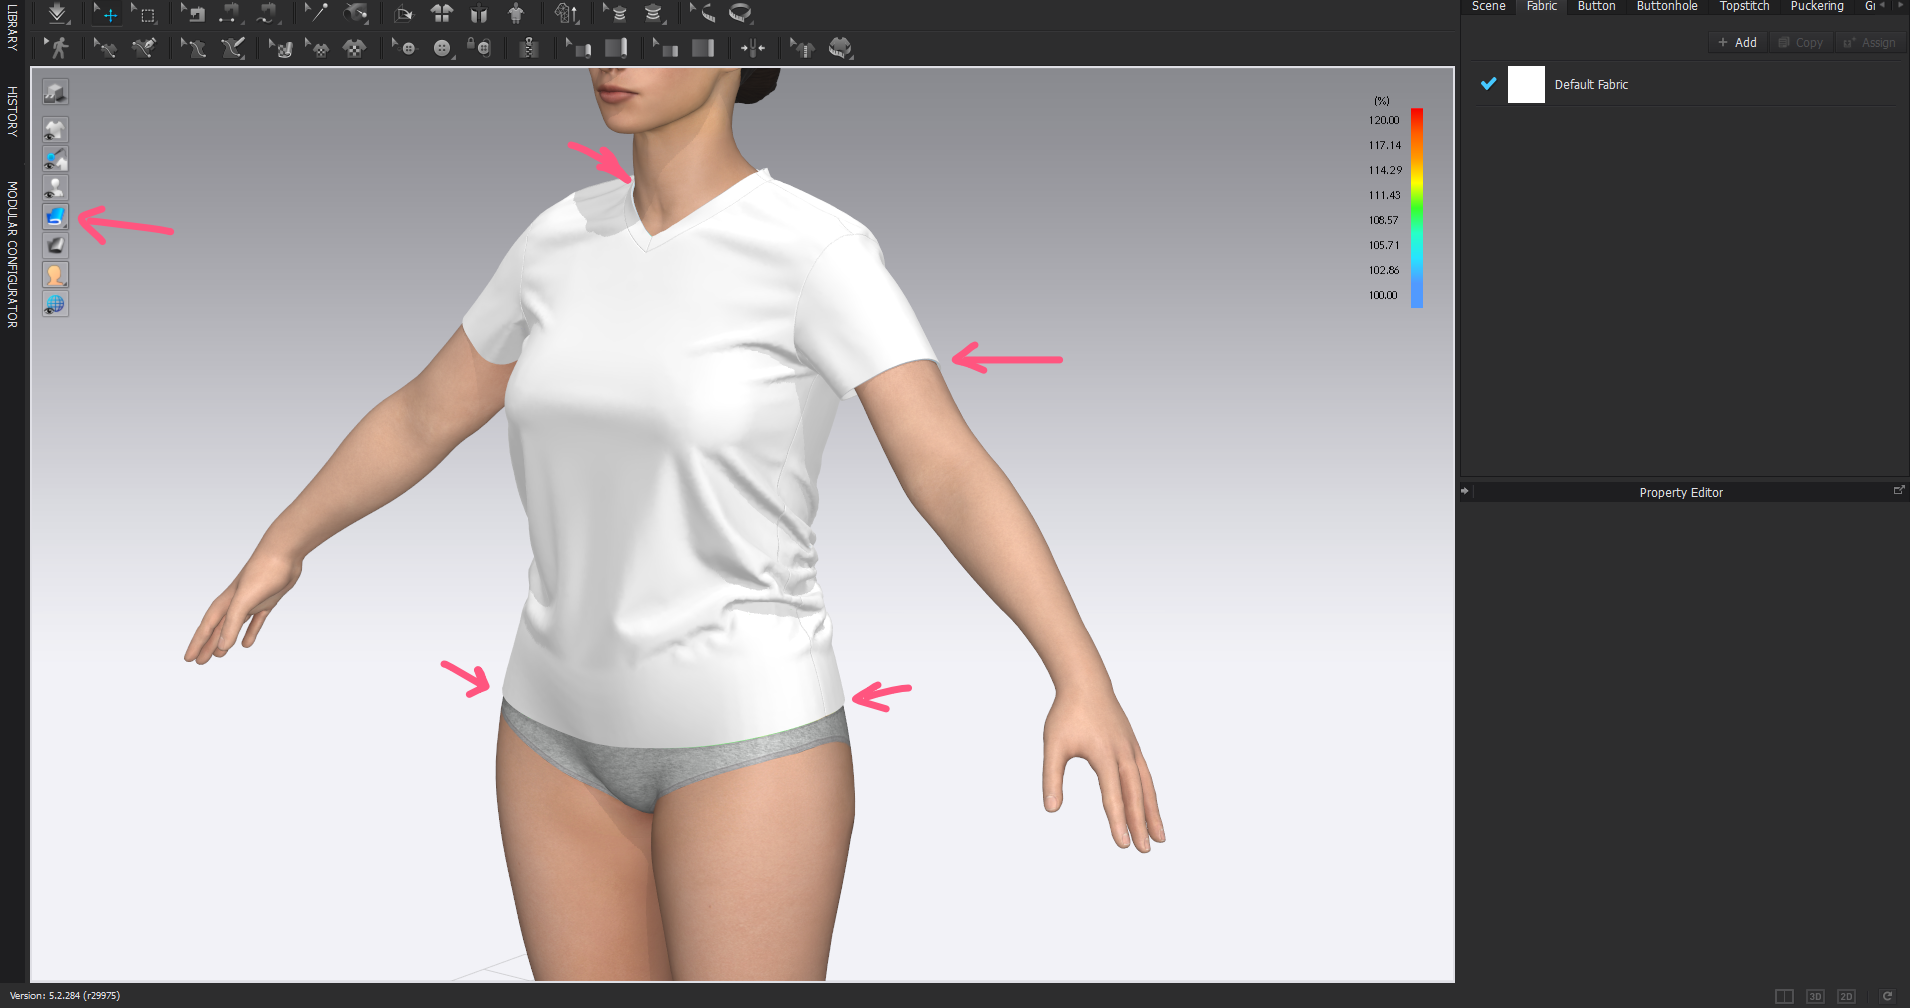
And when you render as (Alt +1) thick textured view you get a nice close fit at camera distance portrait scale. Without having to change anything after that last high res garment simulation and 'fit'.
0
댓글