Assistance with adding bag detail around zipper! - Help please :)

Hi!
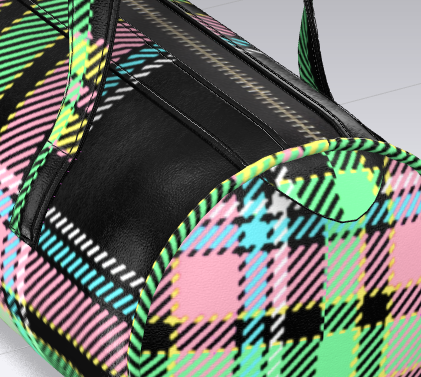
I hope someone can help. I am trying to add a detail around the zipper (see ref image). A common feature on boston bags ect so I need to know how best to achieve this.
When I add it over the internal lines, It goes all curved and rounded and doesn't look flat like the ref image.
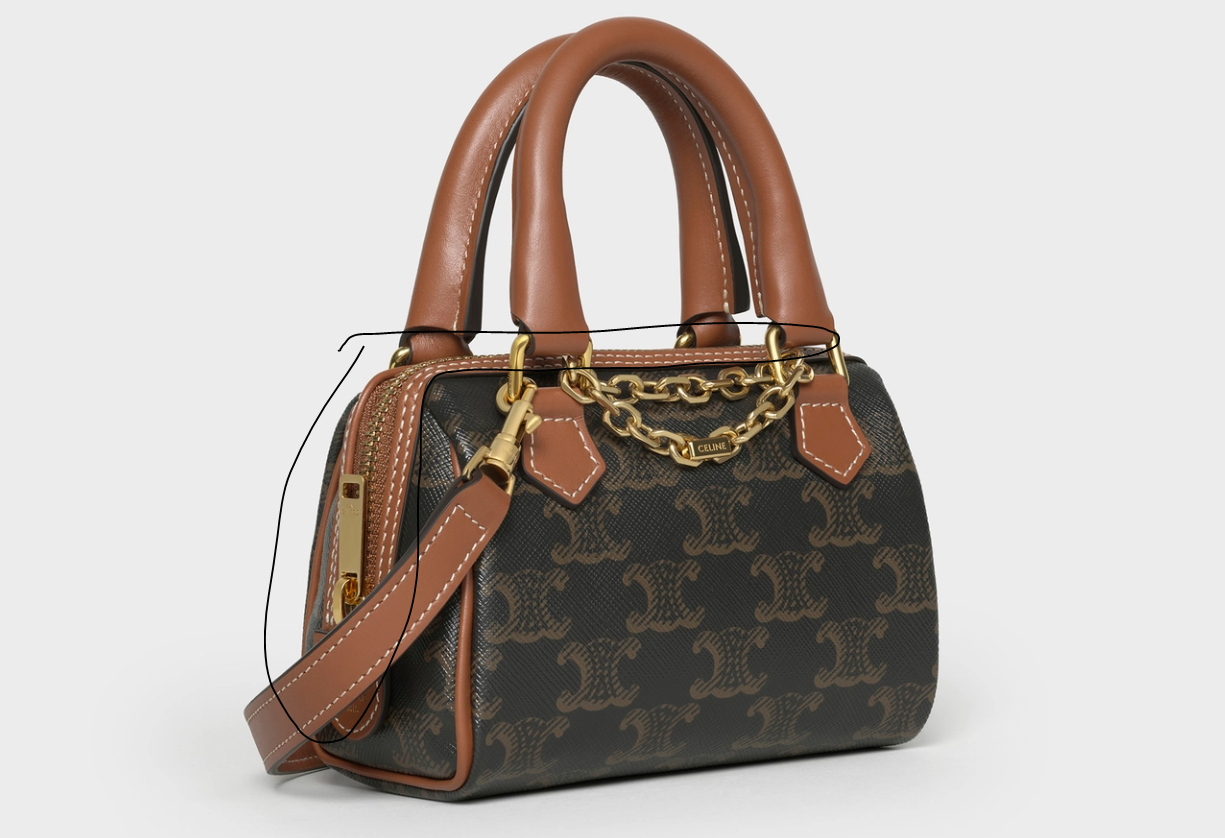

Does anyone have any suggestions on how to improve this?
Thanks
Alexandra
-
Alexandra, I would approach it like this: Cut and sew the piece marked here in orange. You already have the internal line to sew it so use that line to cut and sew. I know these lines go across multiple pieces, so you should merge the separate pieces to make one.
When you cut and sew and merge, you can then simply use the Layer Clone Over function of the new created rectangle piece (just like the one you are trying to sew on top), except that, because this piece comes from the original bag, it will be in the exact same position.
Then, increase the rendering thickness of the piece that is layered on top to match the leather piece on the reference image.
I hope it makes sense. The concept here is, to not sew a piece, but use the shape that is already simulated to "copy" a new piece in the right position.
 1
1 -
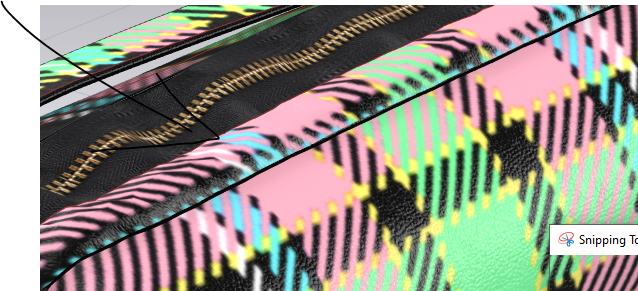
Another thing to keep in mind is the reference bag isn't actually sewn on the edge of the trim, it's only sewn along the topstitching, which is why the trim edge stays flat.
So what you may want is to only sew along an internal line, inside the ones you're using. One way I do this, is sew the edge you have, topstitch it at an offset like the picture, and then right click to add an internal line along the topstitching. Once you have that, put a real line of sewing on the topstitch line, and delete the original stitching around the contour.
1 -
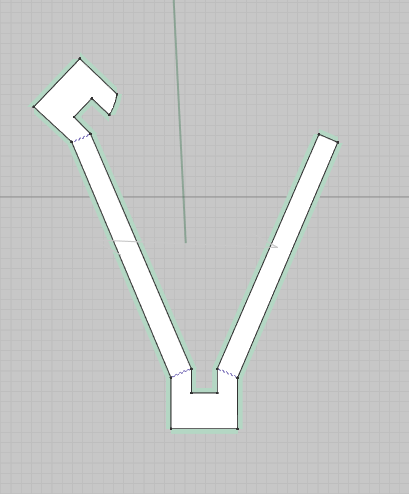
Thank you for your tips! It looks like its working. My only issue is that because both gussets are a circle, the zipper trim cant be a true rectangle (pattern below). One of the seam lines (that I want to merge) looks like this:
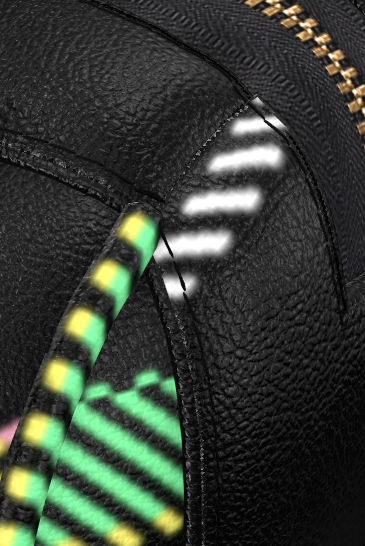
So when I go to merge the pieces I am not able to merge the final piece - I hope that makes sense. See below:
Do you have any tips? Sorry I am still very new to this.
Thanks for your help - very appreciated.
0 -
Real world patterns are always economically cut for production purposes and > grainline <, meaning they are generally rectangles and strips of cloth - you should make it work within those technical constraints as that is how construction is generally made for die cut stamped leather parts. This is important when it also comes to texture and the materials grain direction.
0 -
Alexandra, I see what you're saying. Can you try making the rounded edges straight before merging, so your piece ends up being a rectangle. Freeze the rest of the bag so it when simulating the newly merged pieces they will conform to the frozen parts.
1 -
ottoline Are you referring to the print on the pattern? If yes, this isn't a question about the print and the bag isn't finished yet, but thanks.
pablo.quintana - Thanks Ill give that a go tomorrow ! I tried your process on a basic shape where the zipper isn't inserted into the side gussets and it worked well that way! Thank you.
 0
0 -
The construction and the simulation of the CG patterns should be as you would make it.
So rather than cut many small profiles (development) and try and merge them together, simply explore making a pattern piece cut or die stamped that is the same as you would do in production. When elements are sewn you can use sewing line strength and sewing line fold angle to control most of the piece parts assembled position.
NOTE:
When you are developing patterns for bags, as a principle it can be better as a rule to create a 'bag' buck volume (CLO3D actually has some examples) and import them as avatar (bag volume) and then proceed to use the drafting line on avatar and the undevelop pattern tool to get your basic pattern piece shapes. This way you maintain the correct production volume of the bag, and you can quickly flatform style lines into pattern line pieces. That is probably a far better way for you to work when developing out basic bag pattern pieces.
0
Comentarios