Instance (Copy) feature in CLO3d

Hi everyone,
- In 3dsmax we usually copy & create instances to apply the same Material / Shader or tweak the model is there any way we can do it in Clo3d?
- Is there any way we can create a thready tessle? for the time being I'm exporting it from 3dsMax.
Looking forward for a reply.
-
In CLO the shaders are called fabrics. You can simply apply the same fabric to different pieces.
Not sure what you mean in question 2.
0 -
Hi Pablo,
Thank you for your answer.
Yes, you are right, But when you export any object (Obj file) as trim it comes with a separate fabric (shader) setting. So I have to select each object I imported from 3ds Max to apply the same fabric (shader) setting.
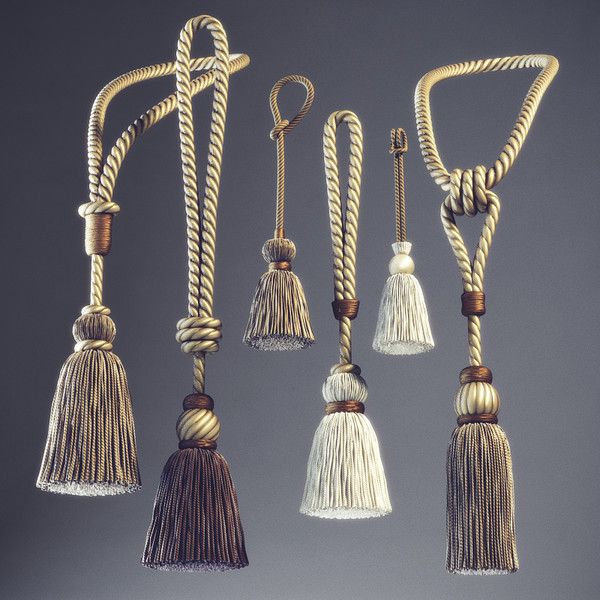
In question 2 I've attached the image. How can we create this detailed Tassle?
 0
0 -
You can import any single object as a 'trim' object model prop.

You can then 'glue' the trim prop to the fabric. So in the model you place an insertion point (x,y,z) (0,0,0) co-ordinate on the model where you want it to attach.Once the model is a trim object inside CLO3D where you pick the surface of the object will be the new glue point (blue dot) to track the cloth surface normal.
As you drag it the insertion point and swizzle (the x,y,z) axis will track the fabrics normal surface with a thread length (glue/tack point) as you slide it around the garment using the glue trim tool. Once placed you can still re-orientate it and scale it using the CLO3D gizmo but it will rotate relative to the models insertion point.
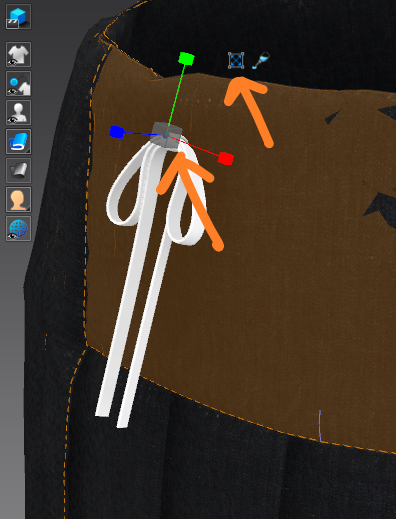
Scale trim gizmo (click the X icon next to the glue bottle icon.
0 -
Hey Ottoline,
Thank you for your help.
The Option you shared with me I already knew, But the issue I am facing is what if i don't want to copy it manually? I want my object (imported Trim) to follow a specific path / Line and create multiple copies with the same spacing? how can we do that?
0 -
In CLO3D > the fabric is the shader. Drag and drop onto the pattern pieces. Other than that you can load any model (trim) and use that objects applied materials and adjust them according to the vray materials (shaders) it supports in the property editor. eg: mat cloth, shiny cloth, plastic, satin , metal , clear etc.
You can export an internal line on cloth as > object nurb > then stroke that path with your model > eg: rope cord > then import that rope model tracing the object nurb back into CLO3D so it matches your simulated cloth perfectly. The only issue is it's only okay for fixed still images as it's not a soft model you can animate, so you need to make sure you don't animate or simulate it again.
Otherwise glue trim onto your garment and give it some weight and it will animate with the cloth.
The only other option is to create a stitch using a imported model section that is at the exact pitch you use when repeating it in your 3D model and apply it as a custom stitch, however that will give choppy results as it treats each section as a small straight section - so not good across curves - and you then need to use the 1st object nurb option. Depends if you are doing a still or animation. When I do an animation for complex trim like that I would typically do it outside and use the object nurb (internal line) to bind a second 3D model onto, that will then give perfect results that track the cloth and then you can path animate that as you want.
You can model a flexible rope in CLO3D pretty easy > see my post reply here >> Rope simulation
 1
1 -
Hey Ottoline,
Thank you very very much. This looks pretty helpful.
Regards,
Maaz Ahmed
0
Comentarios