
Objective
Create and apply custom textures to buttons in CLO in order to express various button styles.
- UV maps for each default button are included in the CLO Asset Library as photoshop files.
- The files can be opened and edited in Adobe Photoshop to apply custom textures and logos to the existing button shapes.
- When UV maps are used, all images or type will increase or decrease in size when the button width, ligne, or thickness are changed in CLO.
Operation
- Download UV maps of buttons from the Library window.
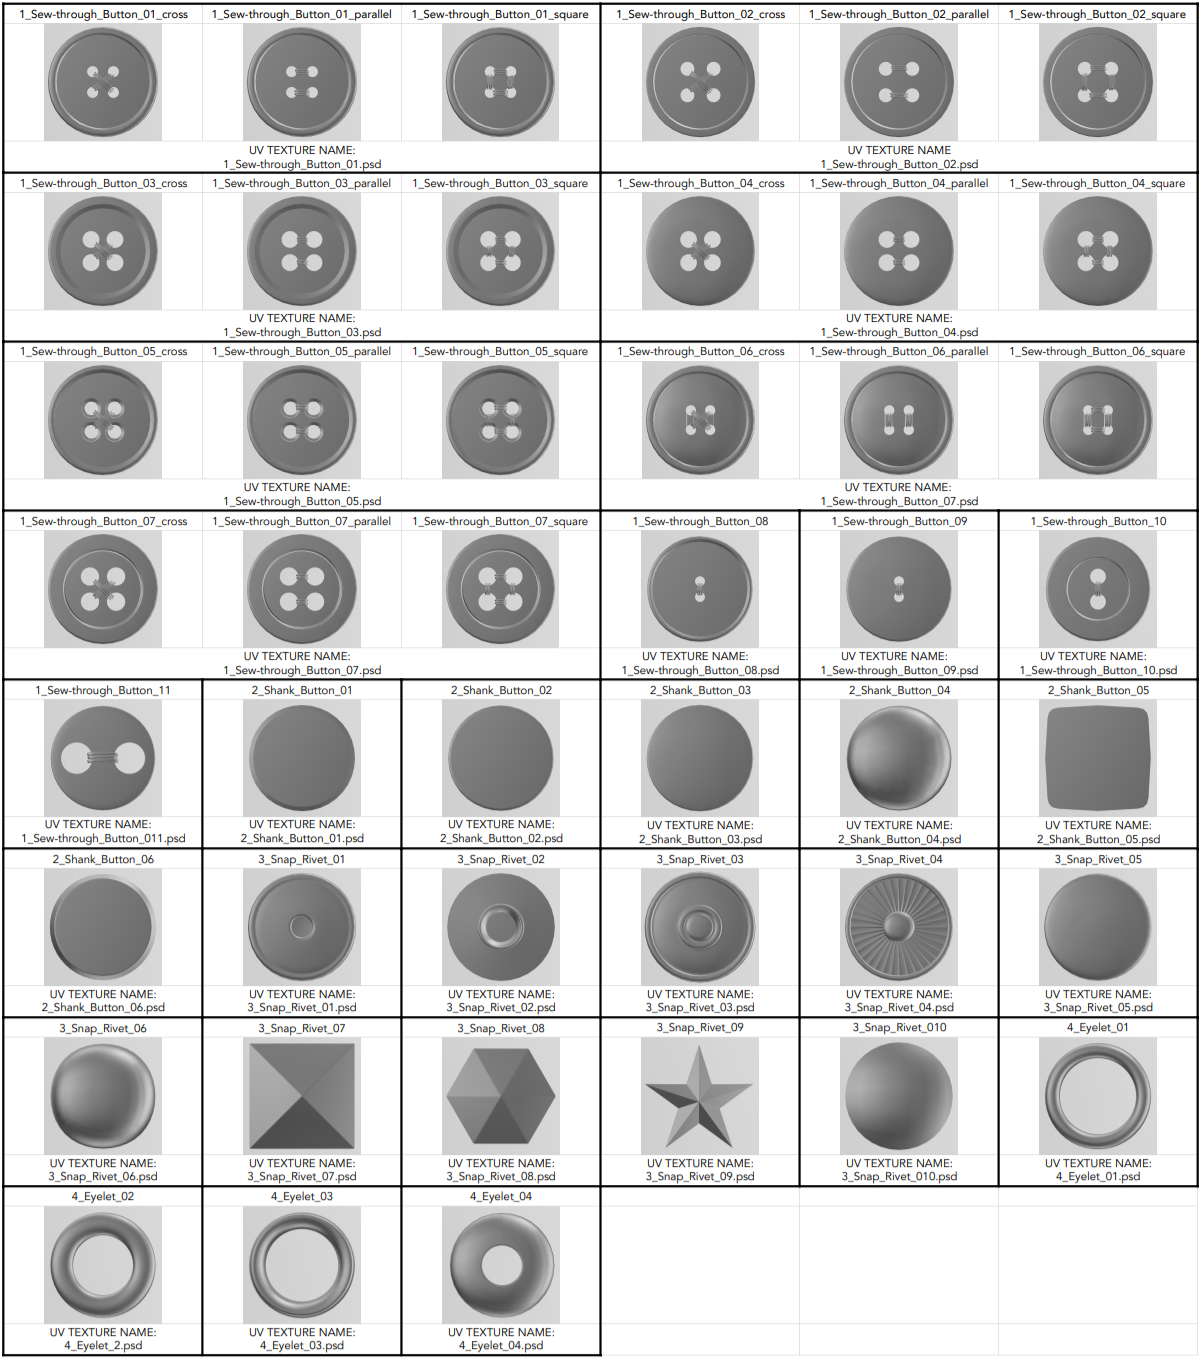
- Locate the asset folder on your computer.
(PC: C:\Users\Public\Documents\CLO\Assets / MAC: User/Library/Application Support/CLO)
※ Note: on PC you can right click on the folder name in CLO Library and choose “Copy the path”. Then you can paste this path location into a file browser to locate it.
-
Open .psd file in Adobe Photoshop. There are 4 types of layouts that UV maps will have.
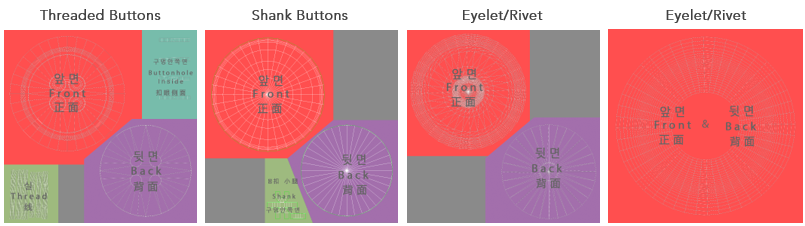
- Each part has a separate layer with a shape defining the section that needs to be filled or covered.
- An image can be placed/embedded or a pattern Define and filled to cover the desired location. Type can allose be added.
- Hide UV outlines and Text layers, then save the image.
※ Note: Saving the image in .jpeg format is recommended.
- Open the custom saved UV map through the Texture section of the button property.
Comments
Hi,
I couldn't find the psd files. Can I download them from somewhere?