2D graphic UV mapping and zipper question

Greetings,
Attached on the top left is what I'm trying to copy, followed by what I've made in Clo. The zipper I've inserted is wider at the top half- how can I make it more uniform? The jersey Material is a Cotton Stretch Poplin and all parts of the mesh are at the same 10 Simulation. I wanted to make the "flaps" cover the zipper but when I "stitched" the Zipper along those lines, the flaps wigged out at Sim. Whats the best method for making a covered zipper shown on the top left? The 2D graphics get distorted on the back panel and I see no options for adjusted the UVs on the mesh- please advise how to adjust the UVs and if there's a Planar mapping similar to Maya, etc. Also, for applying the same graphic on multiple garment panels, is it possible to copy and paste the 2D graphic onto other panels( I created the color breaks by Cut and Sewing each panel together, but they share the same logos)- again similar to the sample shown on the top left. Thank you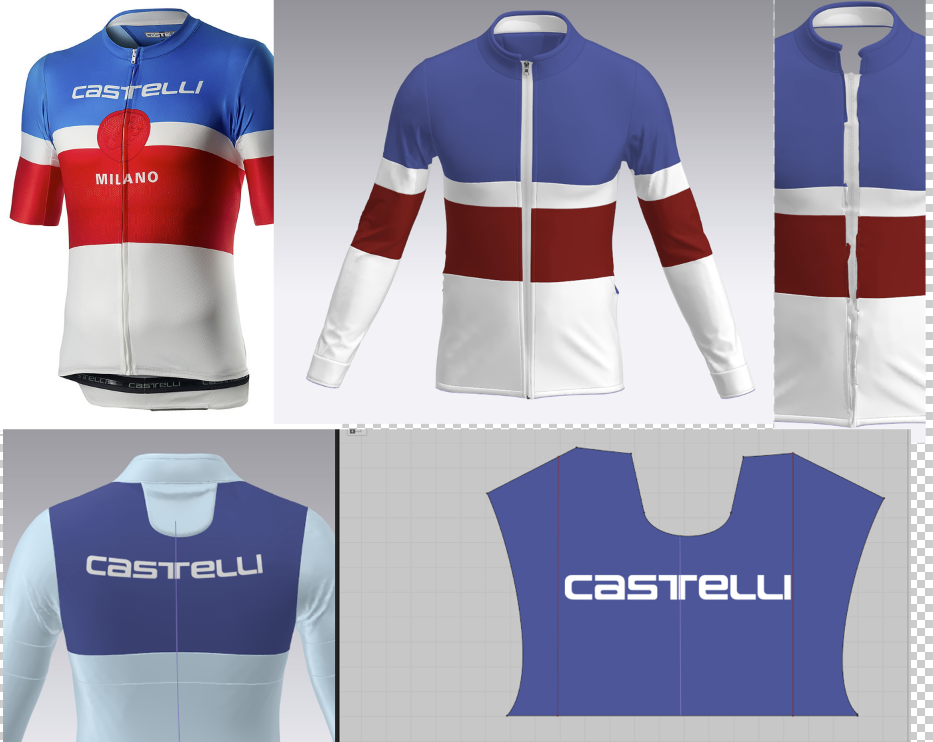
-
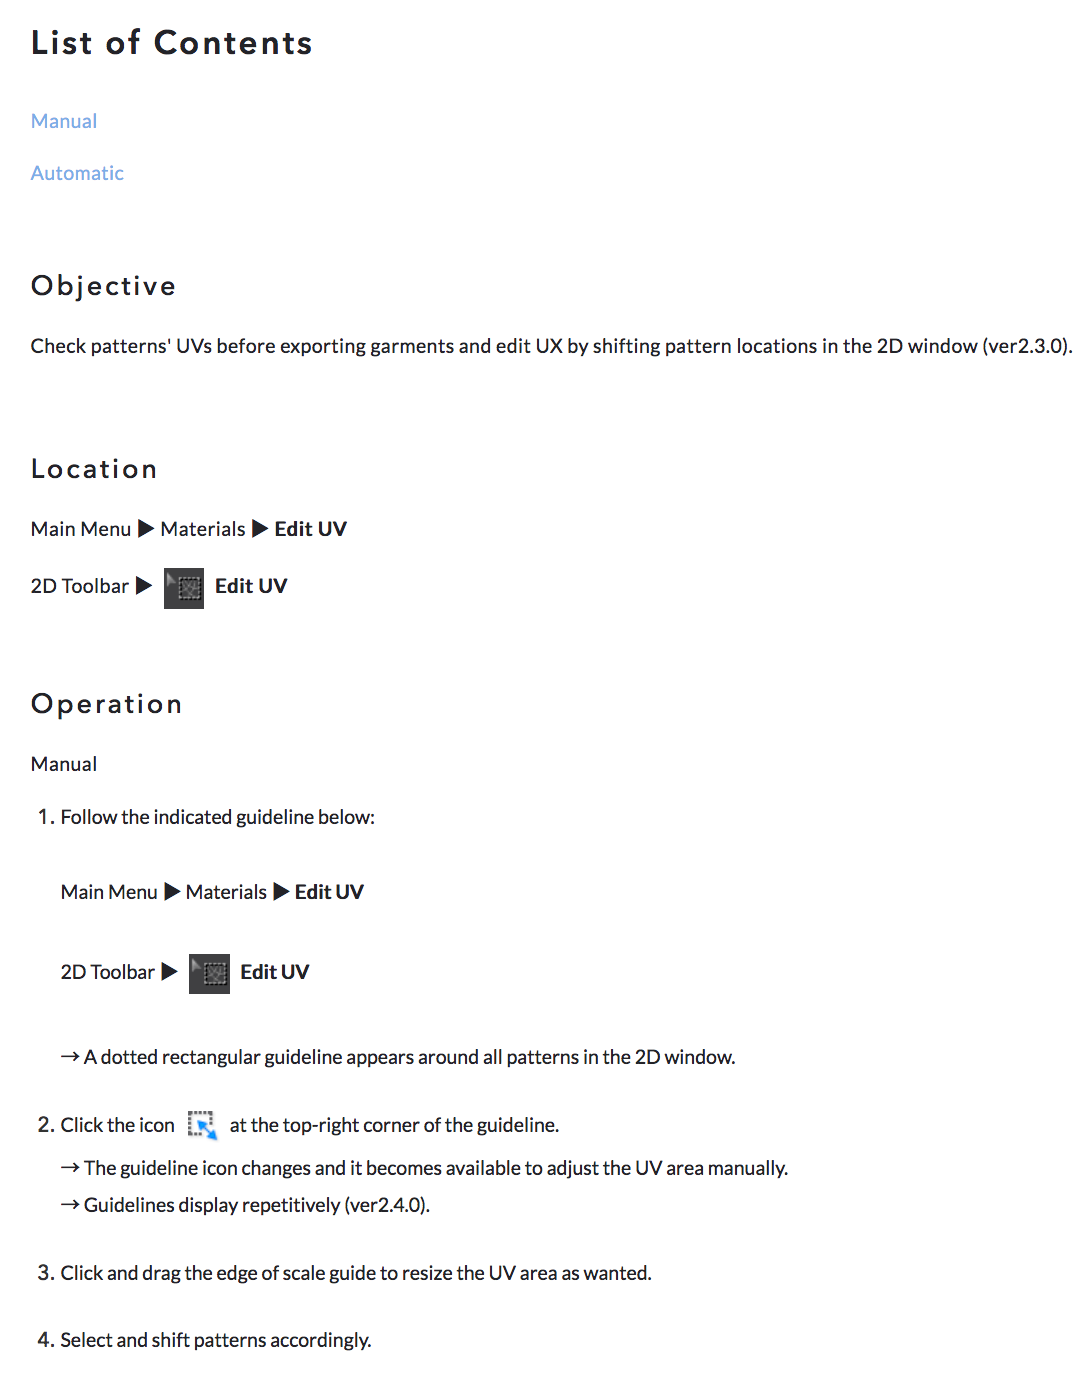
For the UV mapping I found this info which wasn't very helpful- if anyone can explain it better or point me to a video that explains the process, I'd appreciate it, thanks. I'm familiar w/ UV mapping in Maya-
 0
0 -
Teddyg, there is a lot going on in this post. I will share some points and I encourage you to go and try. I believe you can benefit from trying a lot and then come back with specific questions. There is no recipe for things like this.
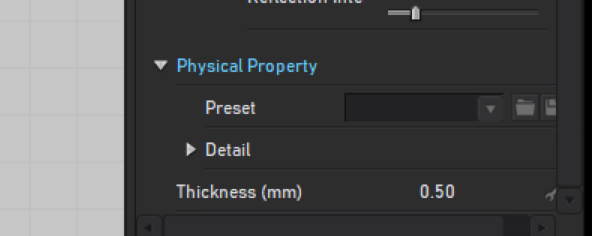
- Zipper. Your zipper is wider at the top because your garment is more stretched at the top than at the bottom. One way to deal with this is using a fabric physical property with little stretch. You can select the fabric you are using for the zipper (and only the zipper) and select Trim Hardware as the preset. This should have much less elasticity.
- For the zipper flaps there are some way I could approach it, but stitching the zipper a few mm behind the front pieces and then cutting and adding strips to make the flaps thicker might work. It all depends on how close the camera will be from that part of the garment.
- There are no planar texture mapping method here, so you the graphics will stretch just like the garment stretches (just like in real life).
- The graphic in the front, which is split between the two front pieces will need to be duplicated and put on each side. Then using the Texture Transform tool (shortcut T) you will have to reposition each side.
0 - Zipper. Your zipper is wider at the top because your garment is more stretched at the top than at the bottom. One way to deal with this is using a fabric physical property with little stretch. You can select the fabric you are using for the zipper (and only the zipper) and select Trim Hardware as the preset. This should have much less elasticity.
-
Thanks Pablo,
I discovered that setting the Zipper's Stretch Weft to 99 made it more uniform throughout. So far I've had issues w/ the zippers- another fabric covering over it gets repelled- as if the zipper has some sort of force field. I had the same problem w/ a backpack that had rain flys over zippers so I couldn't make them. For the most part the 2D graphics map correctly over the garment and follow the natural curvature, but the graphic on the back is oddly distorted and the only controls for the 2D graphic are sizing/scaling, but no bending/distorting. I was hoping there would be a technique to apply the same 2D graphic thats been sized and positioned over multiple pieces of garments due to the color breaks of this jersey that share the same 2D graphic (if that makes any sense). Thanks again for your help!
0 -
teddyg
I don't use the default zipper tool, but create the zipper tapes as a separate piece of fabric and apply a zipper texture (you can download them or create yourself in Psd or Ai),
the same goes for the zippers Slider+Puller, I make a small piece of fabric and add a texture I prepared in Psd or Ai.
0 -
Thanks- I'll try that next time. I've been having issues w/ the default Zipper repelling any sort of rain fly covering it. So do you merely sew the zipper strip w/ Turning or Custom, and what type of Fabric material do you apply to it- a Rigid Trim?
0 -
I made a short video, it is easier to show.https://youtu.be/8ekU-tPFWt0?t=2
I hope you can see the values I enter, quality is not so good, I know.
0 -
Thank you- I watched your video but you used the default zipper instead of creating it as a separate piece of fabric. But I'll try your settings for creating the zipper fly covering that usually covers the length of the zipper (think of one on a backpack). Clo is really good but finding information is usually limited to their "Help" that isn't very helpful, and videos are rather scarce. I've gotten the best help from this forum, thank you
0 -
I know, I thought that you still want to create with the default zipper tool.
Marvelous Designer tutorials on youtube are also helpful and now Clo team is making new instructional videos, better than those old ones. Good luck!
0
評論