Problem with texture in thick mode

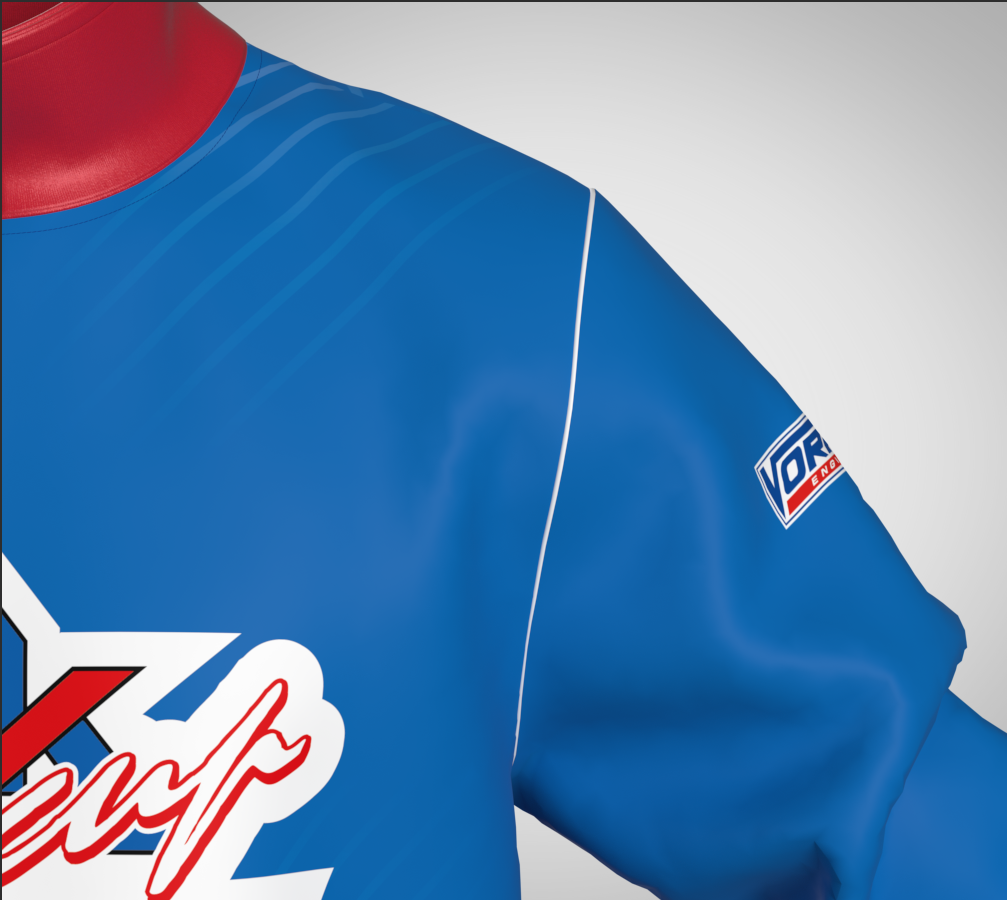
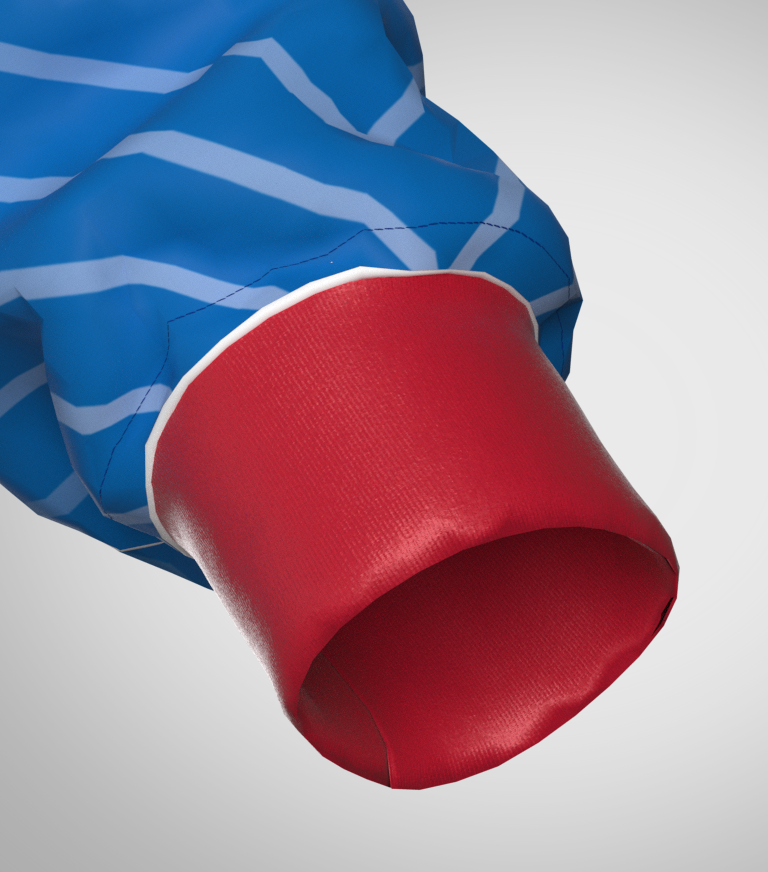
Hello everyone, I created a sweatshirt and I inserted the textures created in illustrator in pdf format into the pieces of the garment. Unfortunately when viewing in thick mode, a white stripe appears in the armholes and wrist attachment. When I view with thin (or textured surface) mode the white stripe disappears.
How do I get rid of the white stripe in thick mode?
thank you
THICK TEXTURED SURFACE ON
-
Hi pttrnmkr,
thank you for sharing your question with us.
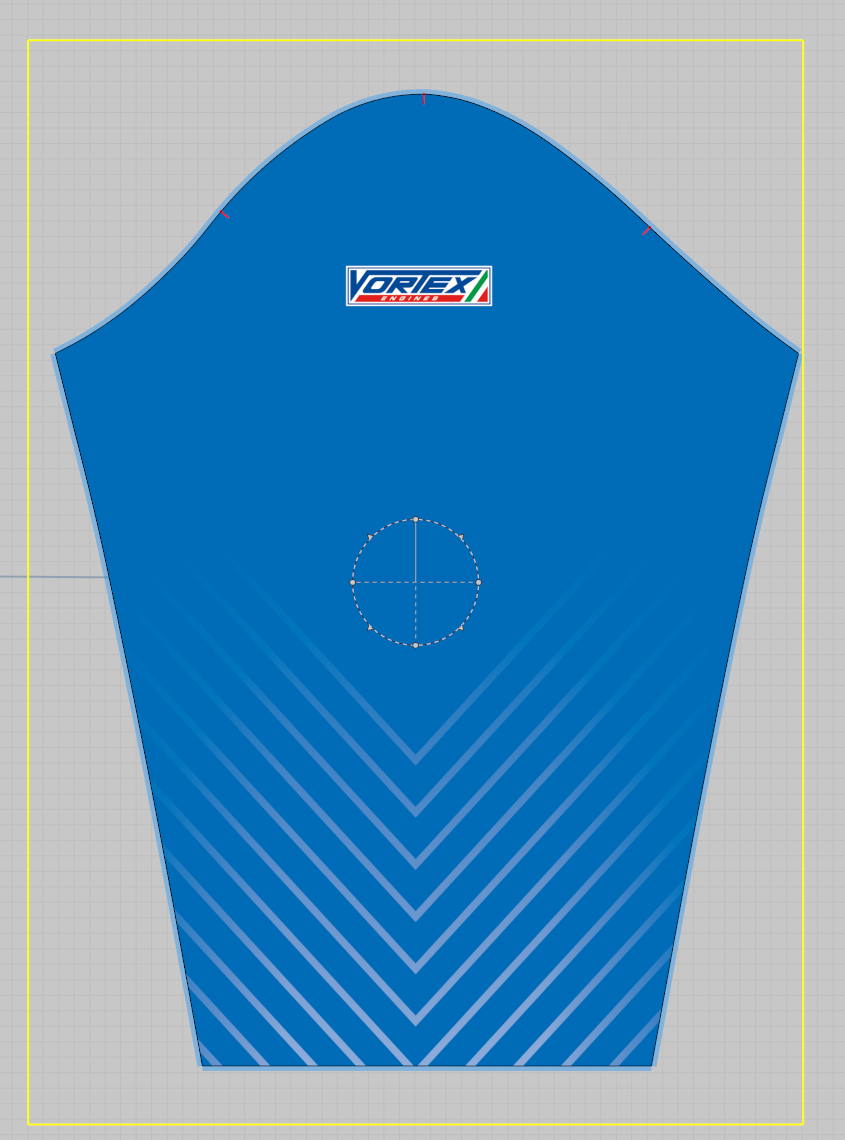
Looking at your images I assume the graphic, you created in illustrator is slightly smaller than the pattern piece, when Addtn'l thickness is applied and therefore doesn't cover the entire pattern piece.
We suggest the following two option to solve this:
a.) Select the fabric which is applied to the pattern pieces and give it the base color of your graphic to match it.
To get a good result, use the Eyedropper tool to pick the same color directly from your grapic.
b.) Or add 1-2mm around your graphic in Illustrator to make sure you cover the added thickness
Best regards
0 -
Hi CLO Designers,
I've checked the graphic before and it's big enough to cover the entire pattern piece, very unusual. I've made it bigger but It's like I have some kind of white piping in my harmole.
I have Tried option "a" and it works fine. However the blu made with the Eyedropper is sligthly different from the texture of the graphic. Any suggestion?

Thank you for your kind answer
0 -
That is the pattern edge normal map > as the graphic is covering the edges of the pattern the normal map (a decal applique) is not being applied like it would if the image were in the base material shader as a diffuse material, so it's an additive layer (decal) issue.
You likely need to apply the 2D artwork to a Fabric shader and a UV map at high resolution and position each diffuse texture at scale to each pattern piece again > see the UV workspace where you can assign your pattern layout to a UV. Then make sure your 2D artwork matches that layout at scale 1:1 with bleed for all RGB textures you place into the fabric shader stack.
This may mean you need to change your layout of pattern pieces to match your 2D artwork origination or vice-versa and then create a new fabric shader with that diffuse map applied at 1:1 scale and then manually locate /scale that new fabric shader on each pattern piece. Unfortunately this is an awkward work-a-round to overcome the normal multiplication glitch through decals (2D artwork) when viewing work-in-progress visualizations and CLO3D have yet to technically solve this issue for normal multiplication over 2D graphics that bleed beyond the pattern edges in typical sportswear digital print workflows.
0
评论