How do I get my graphic to cover thick materials?

Hey!
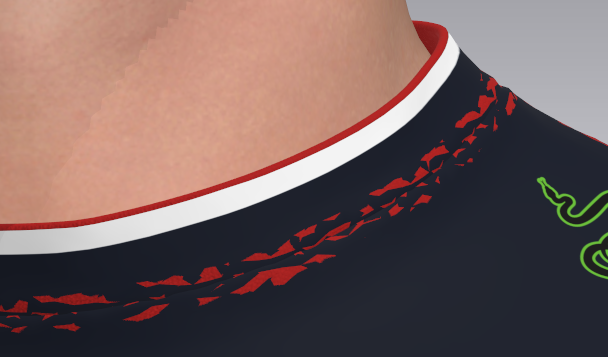
I'm using a graphic to cover the whole pattern, which is very important. I'm needing it to be thick, but the pattern will not cover the edge of the fabric. I really need it to do this.
The fabric is the red part. How do I do this? The end of the graphic is the write rim. On the pattern, the graphic is completely covering it. (Don't mind the red sticking through, there's actually nothing wrong there in the render. Just the red around the collar, above the white. Thanks!
-
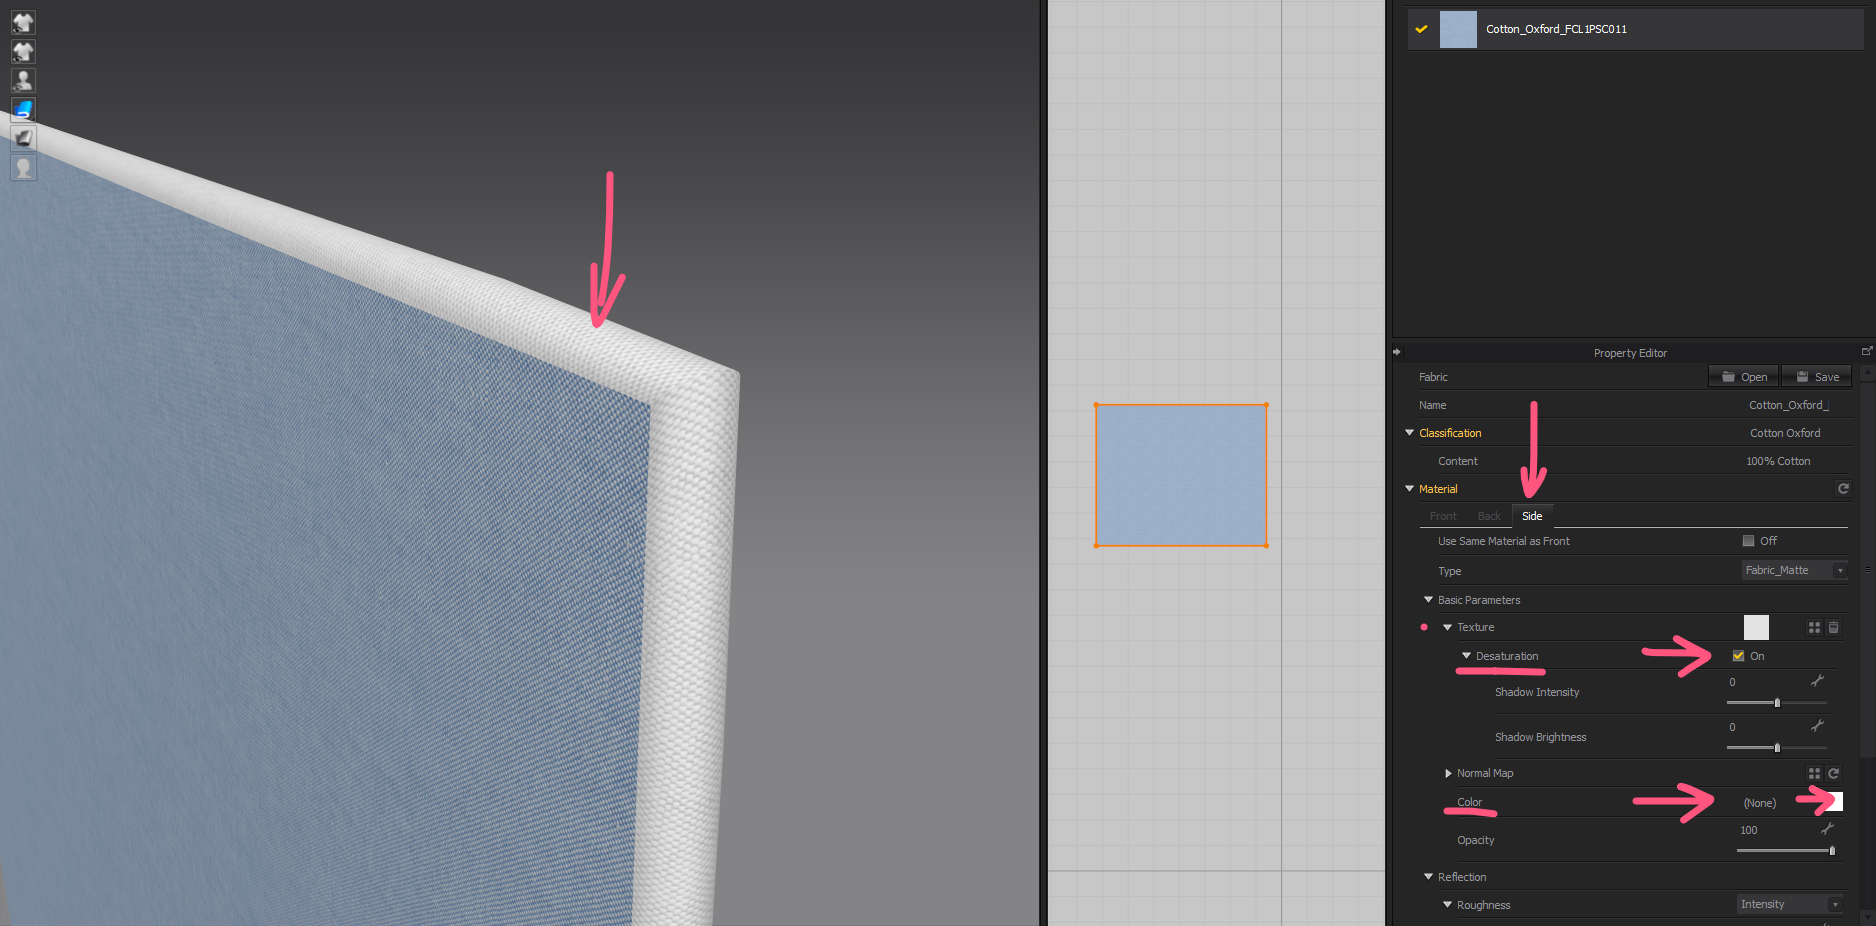
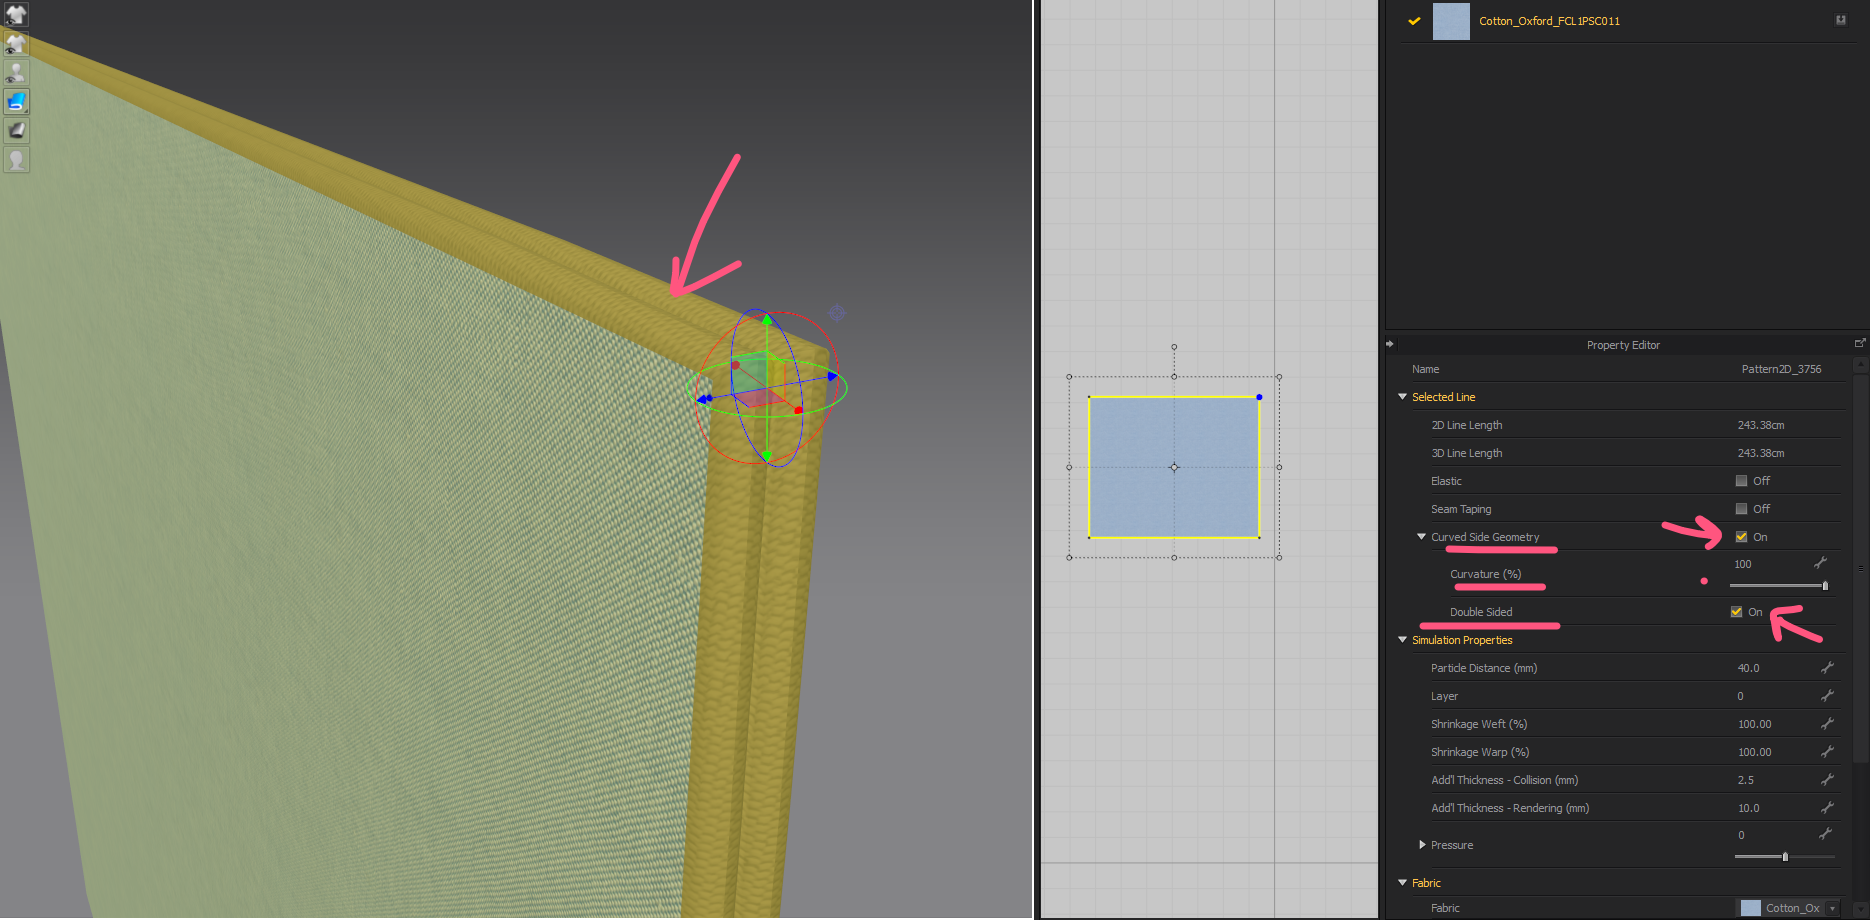
On thick rendered mesh you can elect to place a FABRIC material texture on the pattern edge, and rear face. The default 'Fabric' shader in the fabric stack - is set to use the same front texture (your base white for your pattern piece where you have placed your graphic) on both the edge and rear. In this case you need to change the pattern edge texture to white (or whatever color you want it too be) and also the rear texture color as well if that is also not correct.
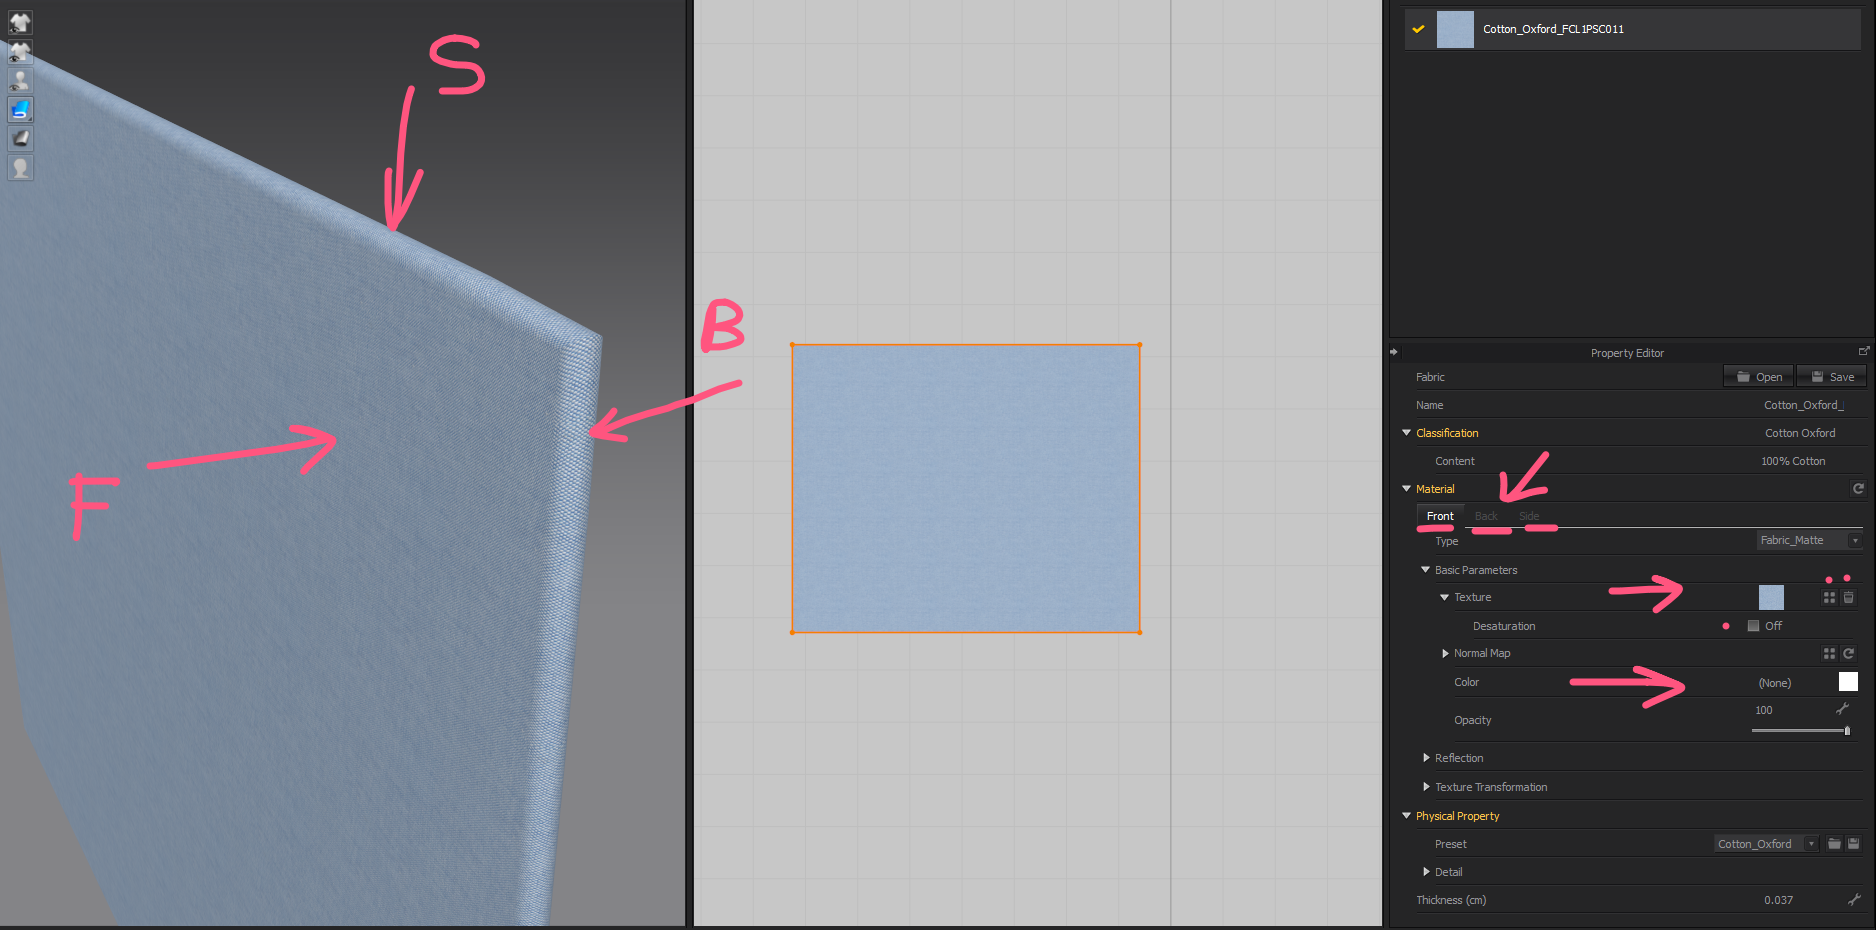
See how I de-saturate the fabric shader texture to keep the normal map and then change the 'color' slot to get a different base color.
Now I edit the back fabric color slot in the fabric shader stack.
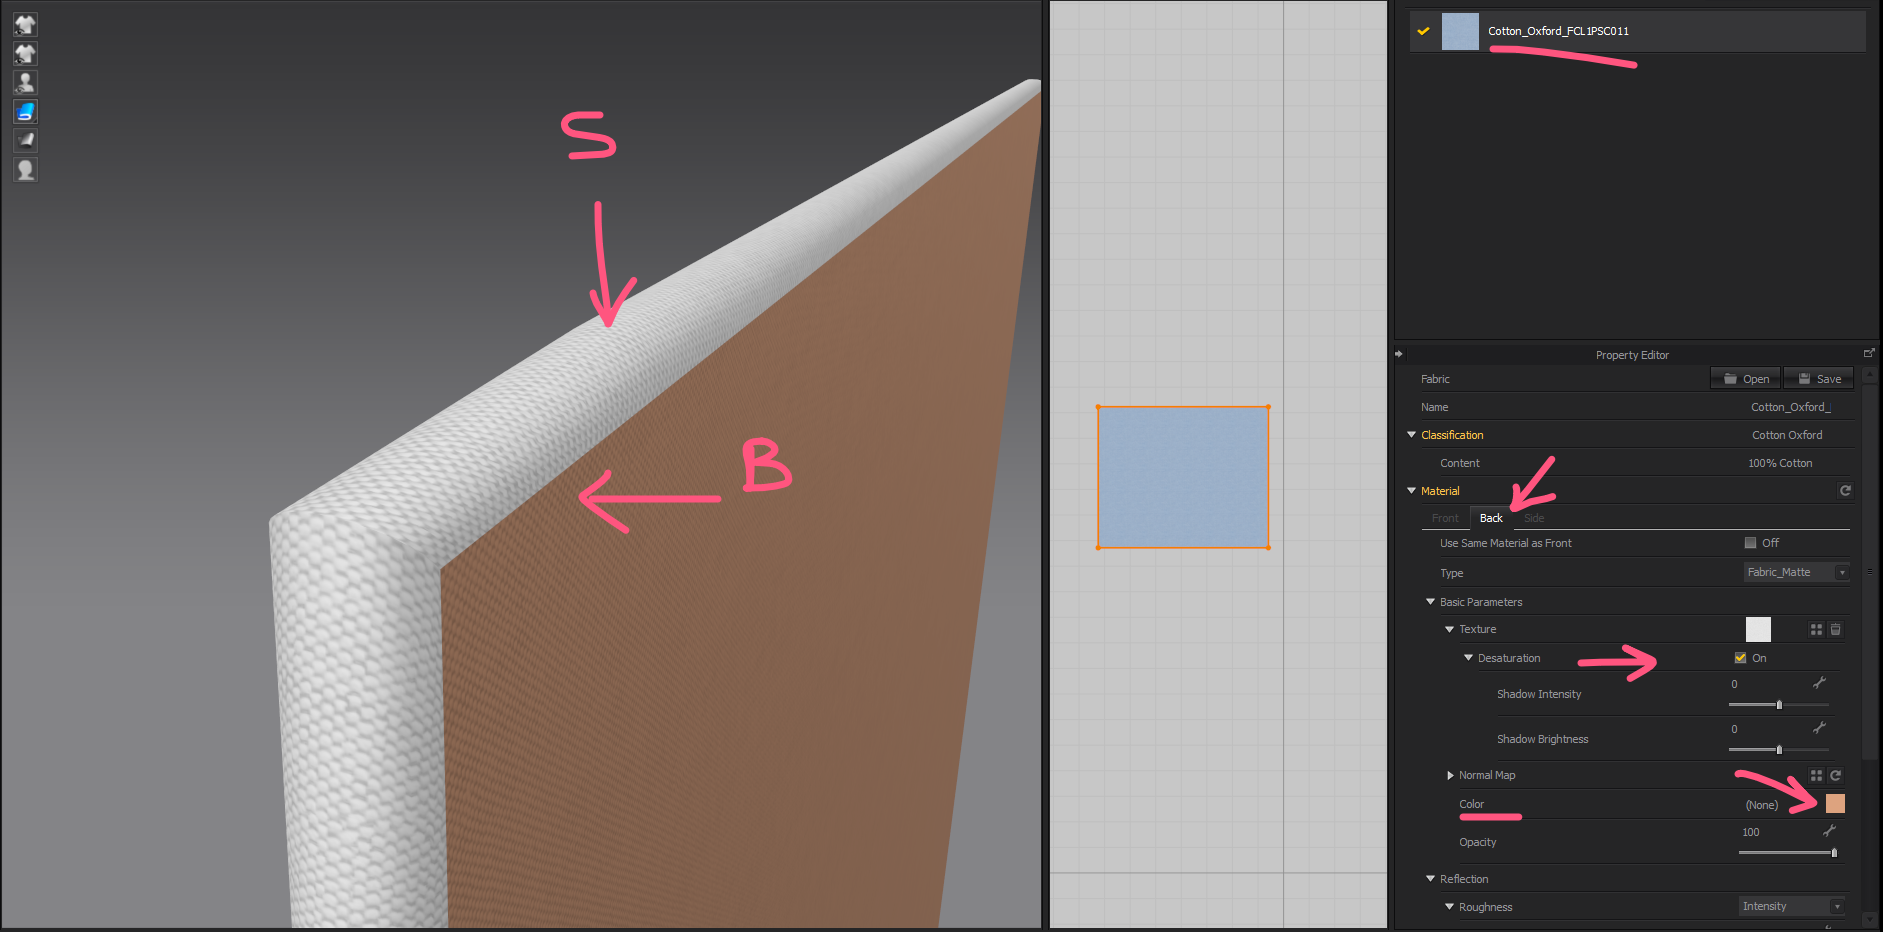
You can change a patterns edge condition from curved to flat or make it double sided. However the base color will change both edges of this side. If you wanted to get it exactly one color to each side (2 texture colors per single edge) you would need to load a color texture tile map into the side > texture > image slot > that tiled at scale for that situation.
Hope that helps.
NOTE: You also need to factor in placing a 2D graphic image onto your pattern piece. If you have done this you need to think of that as an additional layer that sits above the 'fabric shaders' primary texture. In CG that would be the equivalent of a decal image being placed on a surface object.
When you place an 2D graph image on a pattern piece it can also have a normal map. But this must be manually added and scaled to fit the fabric shaders texture. So you may need to be careful there.
If you want a graphic design to be placed over the entire pattern piece (eg: dye sublimation printing for sprorts gear). You may find it better to apply a texture map (UV) that fits the pattern piece with 5mm extra bleed on the texture. The centroid for placing the pattern pieces texture is based on the rectangular bounding selection box size that encloses the shaped pattern piece +15mm.
PRO-TIP:
The easiest way to control object (pattern piece) and image map texture for an entire sports garment assembly that is digitally printed is to ensure you do not drop the UV position. In CLO3D this can be done with sports artwork and dxf or illustrator templates by importing the garment layout as a single pattern in line work and cutting pattern pieces from that initial rectangular artwork. In that manner the UV and texture graphic co-ordinates will perfectly register with all pattern pieces in location. This is a methodology that is about 8 years old, and is how you can productionize this into batch manufacture from a single development process. It also allows you to reduce the amount of art-reworking greatly in the CG model/sample process as you only need one artwork template for all graded sizes of a design laid out to fit the optimal bed width of your digital printer.Many get this process entirely wrong when using CLO3D for digital printing.
1
评论